Showing posts with label Spellbinders. Show all posts

Tuesday, 4 March 2014

Bicycle Love

Bike Birthday
Hey!

Although I've been playing catch up here on the blog, nothing has stopped for the Clearly Besotted Stamps sneaky peeks of the new March release (available for purchase Wednesday 5th March at 22:00 GMT).

I'm waaaaaaaay behind on getting projects whipped up for the sneak peeks. I'm so lucky that Stephanie is been so understanding and is letting me play catch up! Apologies for the poor pics - I'm desperately trying to shoot in daylight but time is always against me at the moment. Bring on those summer nights LOL!

Birthday Bike Close Up

So today's card gives you a sneaky peek at two new sets. I know it's pretty tough to pick a favourite, but I'm going to go ahead and declare that the set Good Times is simply awesome. I love that bicycle! The sentiment is from the set Take Flight. I just love the font of it and figured that it paired nicely with this fun CAS design. :)
tips and tricks
  • To line the bicycle up on the card-base and patterned paper, I stamped it first on the card base and then on a piece of patterend paper which I then die cut. Simply layer the patterend piece on top of the bicycle stamped on the card and line them up.
  • I used a simple masking technique to control the amount of hearts coming from the front basket of the bicycle. The heart stamp is actually much bigger than this and contains lots of sweet hearts. For less hearts, and more direction simply attach a Post-It note to the top of the basket and stamp over it.
  • The red hearts combined with the red strips give three pops of red and help balance the design.
Right, I'm off to stamp and play catch up with the amazing CBS DT and guesties! In the meantime, please do pop across to Stephanie's to check out some more tempting sneak peeks from this month's release including links to the rest of the DT sharing fabulous projects. You won't leave disappointed! :)

Signature2


Monday, 24 February 2014

Art Deco Die Cutting...

Party Time 
Hey!

Happy Monday! I hope the start of the week is treating you well. :)

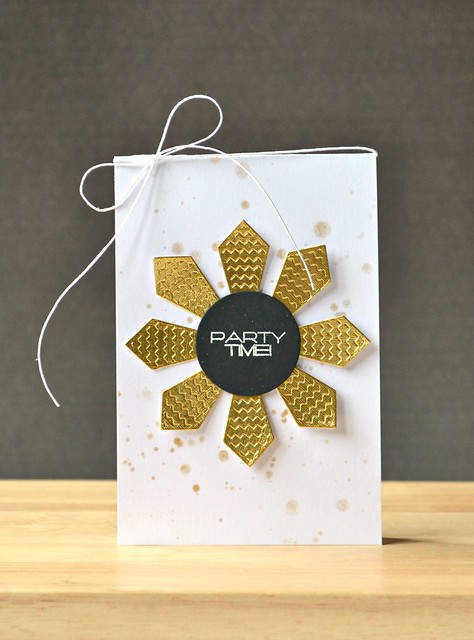
I'm popping in today with a project that is totally inspired by my love for the 1920s art deco movement. If you're raising an eyebrow, think Great Gatsby and you're there already! *wink*

Party Time Front

Now this focal point was created with a Spellbinders circle die and the tiny tie die from Top Dog Dies' Photo Prop Die Set. Yup, a few die cut ties placed under a die cut circle creates a focal point that makes me want to put on a 1920s flapper dress and do the Charleston. :)

tips and tricks
  • In order to space out the rays/ties evenly, I attached four behind my circle at 90 degree angles and then placed the remaining four inbetween each one (does that makes sense?)
  • The splattered background was created by mixing gold Perfect Pearls with water and flicking it on to the card-base with a paintbrush. More water gives a more diluted splatter and less water intensifies the gold sparkles. Blast it with a heat gun if you're impatient in letting it dry like me! :)
  • I added more dimension to the focal point by slightly lifting up the rays from the card base. This is easy if you only place adhesive behind the circular section of the focal point.
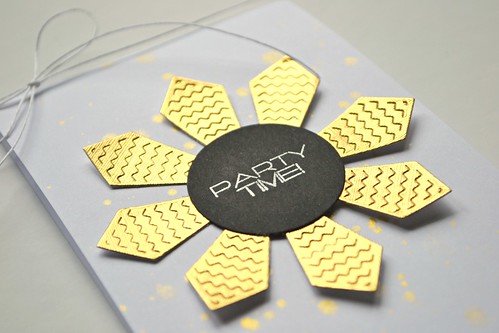
You're going to have to trust me when I say that the gold shimmers beautifully if you're holding this card for yourself. My photography hasn't captured it too well. Hopefully you get the idea with this close up anyway. :)
 
Party Time Close Up

Well that's enough flapping and babbling from me today. Thanks so much for stopping by!

Signature2


Products Used
The gold card is from my stash - I've no idea where it's from, but I've suggested an alternative. Sorry!

Monday, 11 February 2013

Happy Accidents...


wishing you brighter days
Hey!

Welcome to release day and a blog hop Uniko Studio stylee! You don't wanna miss a thing; you should have come here from the Uniko Studio blog. Be sure to comment as you hop too for a chance to win the entire February release!

Up for your viewing and purchasing pleasure today are two super sets: Bright Butterflies, & Label Love: Birthday.

Now as you can see, I took the name of the set 'Bright Butterflies' quite literally. Cue trendy neons to coincide with one of the sentiments from this set for a card that may give you a headache!

 tips and tricks
  • Stamping with dye inks will result in a different colour where they overlap. Neon pink and yellow resulted in a shade of neon orange. Experiment and have fun!
  • Shhhh! Don't tell anyone, but I smudged the sentiment when I first stamped the sentiment on the card front. Does this sound like you too? Don't throw that card away, an easy fix is to stamp the sentiment on a strip of cardstock and place it over the misstamped sentiment; Noone is any the wiser - tee hee!
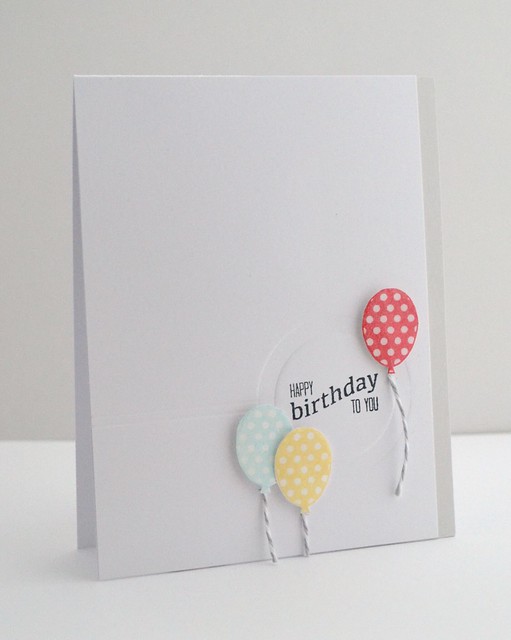
Next up is a card featuring the set Label Love: Birthday. This set landed on my desk just in time to whip up a card for a birthday in the family.

Birthday Balloons

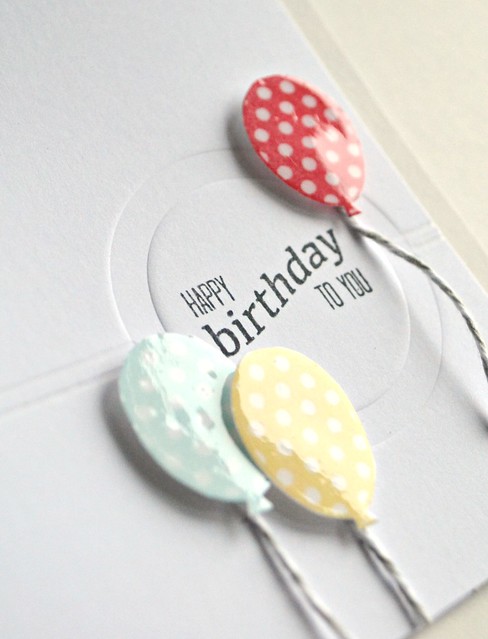
Bring your eyes close to the screen and you might be able to tell that I impressed a circle and scored two lines across the card. This was a happy accident as I was originally trying to emboss on a card front with the blade side of my die, but my shim was too thick: I actually ended up cutting a circle through my card front! However the shim (a sheet of card) I used had a lovely impressed pattern of the reverse side of the die, so I trimmed this down and used it instead!

Birthday Balloons Close

And of course, this card was one happy accident after another: I then realised that I couldn't stamp the sweet balloon strings evenly over the score lines, so I opted for twine instead. Now one thing that wasn't an accident was smothering those balloons in Glossy Accents. :)

 tips and tricks
  • If you're going to score and impress patterns on cardstock, it's wise to do the stamping first! (I wish I listened to myself sometimes!)
  • The three balloons work together to make a visual triangle. They frame the sentiment and guide your eyes to the focal point.
  • Take a look at your dies and try impressing them into cardstock to create patterns. To do this, I simply use an embossing sandwich in my die-cutting machine. If at first the impression isn't deep enough, then try adding a shim (a sheet of cardstock) or lightly spritzing your card with water.
Also included in the February release from Uniko Studio are four new digital paper packs! My printer and I are not seeeing eye to eye at the moment so for now, feast your eyes on them over at the Uniko Studio store. 

That's all from me today, so it's time to hippety hop over to Amber. Remember to comment along the way too if you want to be in with a chance of winning the entire February release...!

Thanks so much for hopping by today and I hope that if you have any accidents whilst crafting, that you too manage to turn them into happy ones! :) 

Signature2


Products Used

Wednesday, 22 August 2012

Diva for the day...


Hey!

Happy Wednesday - just! It's rare that I post so late at night; I'm live bloggin' as I've spent most of today being a Diva (Verve stylee, of course!) an catching up with their fun Anni-VERVE-sary challenges! I was desperate to squeeze them into what's turning out to be a very busy week here.

So I'll get straight to it! I had 3 challenges left to play along with so here are the result from my Diva session!

Challenge 3 - a sketch challenge. I used to be able to follow sketches so easily but now I find that they hinder my mojo more than boost it! I guess it's pretty hard to interpret a sketch like this one to a CAS gal like myself *wink*


I'm serious. This sketch was keeping me up at night! But maybe that's a good thing because I'm happy that I managed to crack it:

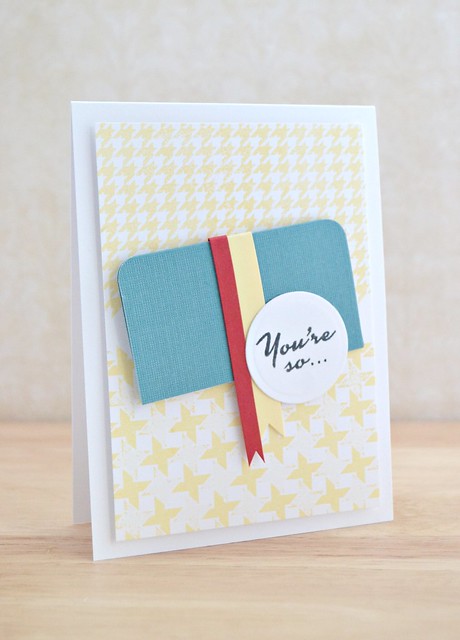
P You're so...

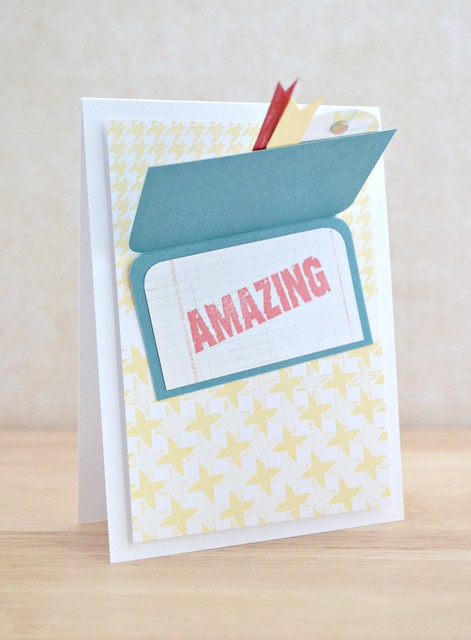
Now it's still kinda CAS...I inked up some new Paper Smooches background stamps for the houndstooth pattern but the rest is Verve. The rest you ask? Surely there's only one more stamp on this card? Well there's a li'l magnetic magic behind this card - simply lift to complete the sentiment:

P Amazing

Hee! I do love an interactive card, even if the sketch behind it nearly killed me! I simply adhered a tiny magnet behind the circular panel of card and another magnet behind the houndstooth pattern. I was lucky enough to be sent some samples of magnets from Magnet Expert and I love 'em! The sizes range from the super big to the super tiny, perfect for cards that require an interactive feature *wink*

Challenge 4 - a challenge that I think was thought of just for me (and my buddy, Lynn!)


Woo hoo! This I can do in a jiffy - no sleepless nights for this challenge! :)

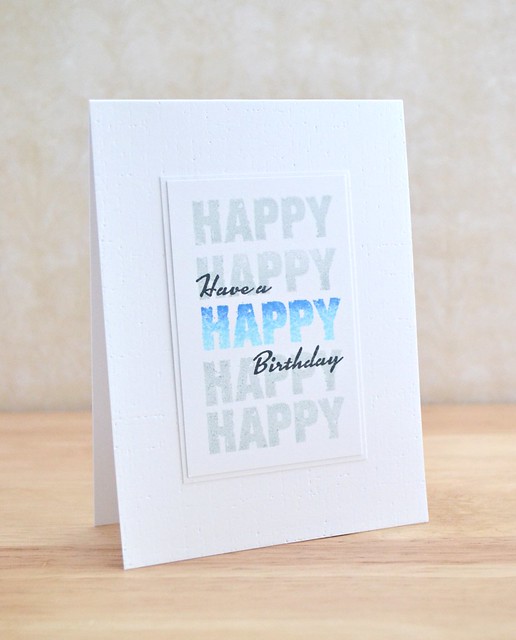
P Happy Happy Happy

This card will be heading to either my brother, or my guy's brother for their birthday soon.

4 challenges down, only one more to squeeze in! Challenge 5 was something that I don't do enough when I think of all the supplies I own:


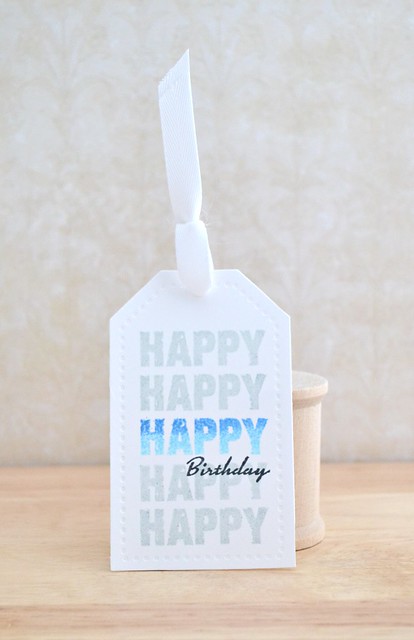
Now I'm gonna 'fess up - I was getting pushed for time at this point. My guy is off work too and wanted to head out so I needed to whip up something quick. So cue a coordinating tag to match the card created for Challenge 4:

P Tag

I now need to get busy stamping coordinating wrapping paper methinks! Ha!

Right, if you've made it this far, well done! And if you've just looked at the pictures and ignored the waffle then that's OK too - it's late after all!

Thanks so much for stopping by tonight (or today!) I can hear a cuppa calling me so I'm signing off.

Catch ya later!


Card Deets
{You're so AWESOME}
Stamps: Happy Days (Verve Stamps)/Large Houndstooth Background, Small Houndstooth Background (Paper Smooches)
Ink: Buttercup (A Muse)/Red (Versamagic)/Tuxedo Black (Memento)
Cardstock: White, Pure Poppy, Harvest Gold (Papertrey Ink)/Teal (Bazzill)
Patterned Paper: Ledger from Basic White 6x6 Collection (Basic Grey)
Accessories: Small Magnets (Magnet Expert)/Chompy (Corner Chomper)/Circle Nestability (Spellbinders)/

{Have a HAPPY Birthday}
Stamps: Happy Days (Verve Stamps)
Ink: London Fog, Tuxedo Black (Memento)/Blue Marvy Blending Block (Marvy)
Cardstock: White (Papertrey Ink)
Accessories: Linen and Canvas Impression Plate (Papertrey Ink)

{HAPPY Birthday Tag}
Stamps: Happy Days (Verve Stamps)
Ink: London Fog, Tuxedo Black (Memento)/Blue Marvy Blending Block (Marvy)
Cardstock: White (Papertrey Ink)
Accessories: Tag Sale #3 Die, Fresh Snow Twill, Cream Button Twine (Papertrey Ink)

Saturday, 21 July 2012

Sending Sunshine...

Hey!

Happy Saturday! Happy Summer Holidays (for me!) and Happy Release Day at The Craft's Meow!!!

The Craft's Meow


Yup today you can purchase all the sets we've been previewing with the exception of 'Summertime with Fibi and Lilly' which is free with purchases over $50!!!

We're celebrating with our usual blog hop so if you've come from my buddy, Amy T's blog then you're in the right place. If not, then you'll wanna start here as if you leave a comment on each hop, then you could win the entire release!

So on to my hop project. I decided to combine two very summery sets - 'One Scoop or Two?' and 'Summertime with Fibi and Lilly'

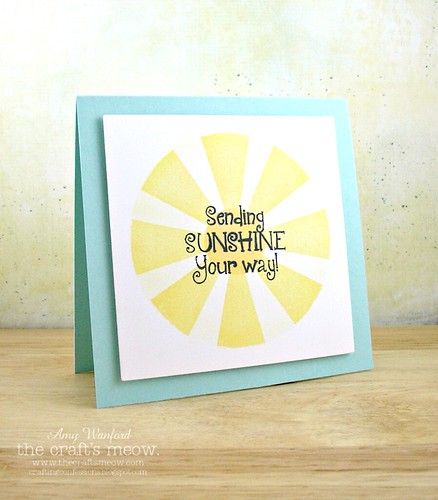
Sunshine

I realised after playing around with 'One Scoop or Two?' that the solid cone image could also act as a ray image! So I die cut a circle, used the negative and stamped the rays as well as dusting shimmer chalk inbetween the stamped rays. I then die cut a small circle and used the negative to sponge ink and create the centre of the sun before stamping the sentiment over the top. I love that I've now got even more use out of that set! :)

Well that's it from me, I'm sure you'll be itching to hop along to your next stop which is another fabulous buddy of mine, Iwona Palamountain!

Thanks so much for stopping by here today!

Catch ya later!


Card Deets
{Sending Sunshine Your Way}
Stamps: One Scoop or Two?, Summertime with Fibi and Lily (The Craft's Meow)
Ink: Buttercup (A Muse)/Tuxedo Black (Memento)
Cardstock: Aqua Mist, White (Papertrey Ink)
Accessories: Nestability Circle (Spellbinders)/Chalks (Dovecraft)

Copyright/Disclosure

I am on various design teams and receive free product to use and promote. I geniunely love the products of the companies and all opinons are honest and my own.

I'm flattered if I've inspired you and you want to CASE anything of mine, but please don't enter it for commercial publications or competitions.
Thank You!
All designs, text, and photographs on Crafting Confessions are ©2009-2016 to Amy Gray unless stated otherwise.