Showing posts with label Memory Box. Show all posts

Wednesday, 28 May 2014

More 'Exploring'...

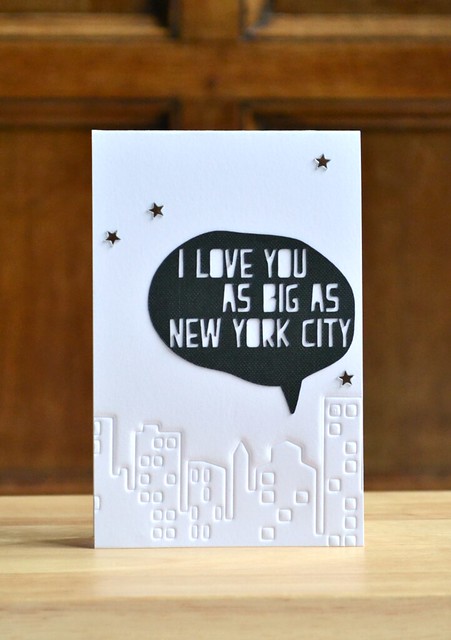
I love you as big as NYC
Hey!

I'm back today, as promised, to share with you a couple of projects created using the Cricut Explore. This machine is available in the USA and hits the UK market on 1st June. For more deets on it, check out my review post here. 

As I mentioned in my review post, this machine has had me 'exploring' on crafty adventures that I'd never imagined myself going on. Heck, this machine achieved the impossible and had me enjoying ironing LOL! But for today's post I've reverted back to my comfort zone a little with this card. I immediately fell for this speech-bubble image in the Cricut Design Space and just knew I had to use it on a card.

The image was so easy to customise: I simply loaded it up, changed the size, and cut it on some textured black card that came with the machine. After that, it was simply a matter of impressing a Memory Box skyline die across the bottom of a card base; attaching the speech-bubble sentiment; and sprinkling a few star. Finished!

In addition to playing a part in my papercrafting and my laundry room, this machine has also explored our kitchen. Our chalkboard to be precise:
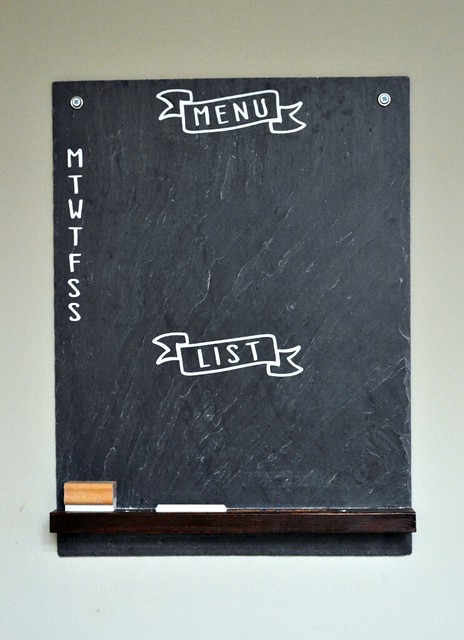
chalkboard

This was created using a banner image and a chalkboard font on the Cricut Design Space and was cut from Cricut Vinyl. The joy of using vinyl is that it's repositionable and I can remove it easily if I need to; I think this vinyl could be staying put though. :)

tips and tricks
  • You can customise the speech-bubble design further by deleting the text and adding your own sentiment. If you love the font originally used (as I do!) then try these free fonts, Helveticamazing or KG Bless Your Heart.
  • To impress my die on to the card rather than cut it, I simply followed an embossing sandwhich on my Cuttlebug along with an embossing mat. Mmmmm embossing sandwich - sounds yummy LOL!
  • The Cricut Vinyl I used to create the chalkboard stickers was originally silver as I didn't have any white. Too impatient was I, that I went ahead and cut the design from the silver vinyl and applied a layer of white acrylic paint over it. Worked a treat and any brush strokes are in keeping with the chalkboard theme anyway - bonus! :D
I have yet more 'exploring' to do with this machine and more projects to share with you. I wonder what room of our place we can invade explore next....?

Thanks so much for visiting today. I hope you have a super duper day!
Signature2


Products Used
N.B I've listed products that are available here as well as across the pond in the USA via Amazon. They appear below as multiples of the same product - just click on the one based on your location. :)

Tuesday, 22 April 2014

Die -> Stencil -> Lettering -> Video Tutorial...

 Hey
Hey!

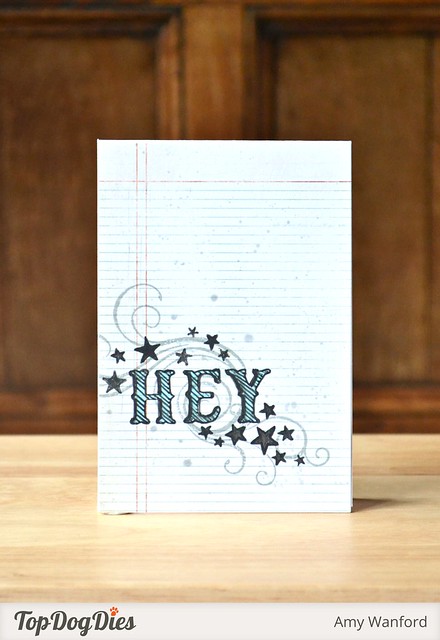
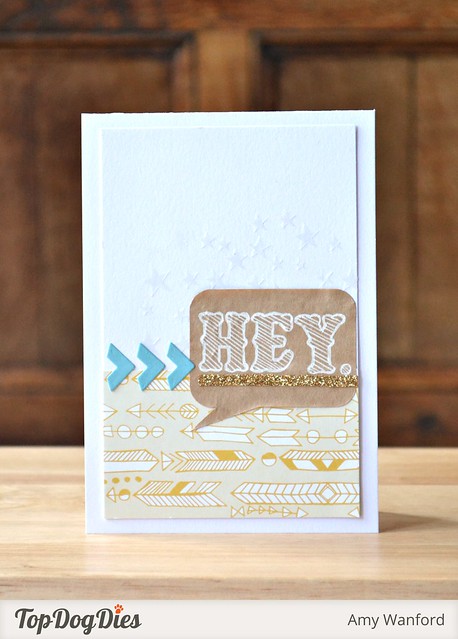
I'm over on the Top Dog Dies blog today with this card. It features a mish-mash of products and techniques. It's kinda similar to yesterday's card but I like to think that this one is a little more grungy. :)

I've been playing with stencils on this card (as well as stamping of course!) I used a swoon-worthy Memory Box stencil to select random stars to draw around my sentiment and I created a stencil of my own using a Top Dog Dies die.

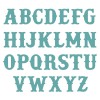
I used the Top Dog Dies Vintage Alphabet Die to create my lettering by simple creating a stencil from it. I did the same for yesterday's card too. I've braved the camera and created a little mini-video-tutorial to show you exactly how I do this. I do babble a lot but I hope it gives you a better idea of how easy this is to do:
 

If you can't view the video for any reason, check it out here. :)

Easy, right?! To grunge up my card a little more I added some stamped flourishes and ink splatters - it makes such a difference to the design which looked a little bare before. However, I then realised the flourishes stamped over my lettering so I shaded the lettering using a pale blue marker.

Well that's all from me today! As always, thank you so much for stopping by today! 

Signature2


Products Used

Monday, 21 April 2014

Top Dog Dies & Scrapbook Circle Unite!

Hey
Hey!

Happy Easter-Bank-Holiday-Monday! :D

I'm hopping in today as part of a fantastic hop as Top Dog Dies and Scrapbook Circle unite!  You should have hippety hopped over here from Scrapbook Circle, but if you haven't then be sure to start out at the Top Dog Dies blog.

Top Dog Dies are giving away one Scrapbook Circle List Kit and Scrapbook Circle are giving away 2 prizes of $50 in Top Dog Dies wafef-thin dies! Be sure to pop over and register over on the Top Dog Dies blog to be in with your chance to win! Check out this Top Dog Dies offer too:
Oooh and there's a special discount code for Scrapbook Circle too: Use the code 'scrapbook20' to receive 20% off your order today through to May 31st 2014.

Scrapbook Circle create monthly scrapbook kits that include custom printable and coordinating digital files. Exclusive items are included in each kit and is chock-full of current, trendy products. As a card-maker myself, I had no problemo getting busy with the kit! :D

Lucky for us Top Dog Dies DT, we got a stash of goodies to work with and I couldn't wait to get busy with some gorgeous Studio Calico paper and these cool, kraft speech bubble stickers. Love them!

I added a touch of Top Dog Dies goodness in the form of the photo corners from the Camera Finishers Die Set. I just rotated them 90 degrees to act as arrows instead to direct your eye to the sentiment and also to coordinate with the patterned paper.

HeyCloseUp

I also used the Top Dog Dies Vintage Alphabet Die as a stencil with my white gel pen to create the sentiment. Easy peasy!

For a touch of extra detail I got busy with a Memory Box Stars stencil and some translucent embossing paste. Oh, and a scrap of gold Cricut iron-on material finishes the card off. :)

Well I hope you get lots of inspiration on the hop today! Next on your hop is the fabulous and fellow Amy, Amy T! :D

Thank you so much for hopping by today - happy hopping!

Signature2

Monday, 7 April 2014

Authentique Paper & Top Dog Dies Team Up...

HB2U
Hey!

Happy Monday! It's the start of another working week (the last one for me before the Easter holidays!) and it's also time for another Top Dog Dies project and this week we're teaming up with Authentique Paper!


This isn't your typical blog hop, but one that's lasting all week! Be sure to pop across the the Authentique blog and Facebook page every day this week for fabulous projects featuing the perfect pairing of Authentique papers and Top Dog Dies dies. In fact, tell 'em that Top Dog Dies sent ya and enter yourself into a special giveaway of an Authentique Prize Pack!

For my part in this project inspiration blog hop I've whipped up two projects. Authentique were kind enough to send us, the Top Dog Dies DT, scrummy papers to work with the form of the Anchored 6x6 paper pad and the Classique: Elegant 12x12 collection kit.

HB2U Close Up

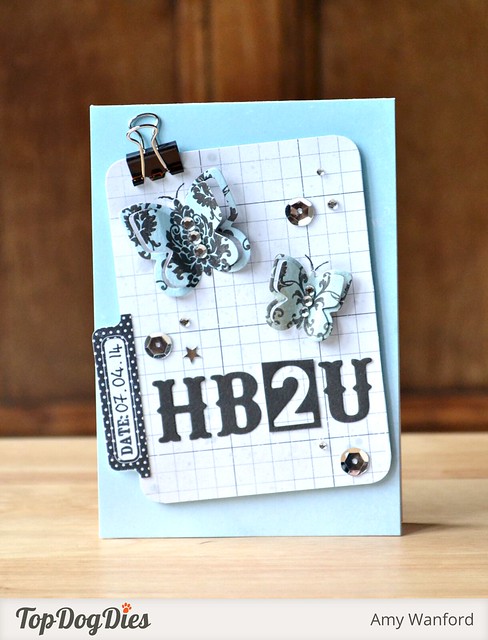
My first card today features elements from the Classique: Elegant collection combined with the two sweet butterflies from the Top Dog Dies Butterfly Finishers Die Set as well as the Top Dog Dies Vintage Alphabet Die to create my sentiment.

    tips and tricks
  • I entered today's date on the date tab because this card is having to my SIL in who celebrates her birthday today! You could always leave this blank or use a stamp to stamp the word 'today' if you're not sure who to send it to, or you're not happy handwriting on it!
  • I dug deep in my office supplies to find this mini bulldog clip. It suits the style of the card and makes a fun embellishment. :) 
  • I didn't own a number die in the same, vintage style so completely mixed things up by using a Memory Box die. Instead of trying to make it match the vintage style I gave it even more contrast & purpose by using the negative shape of the die cut.


Bon Voyage

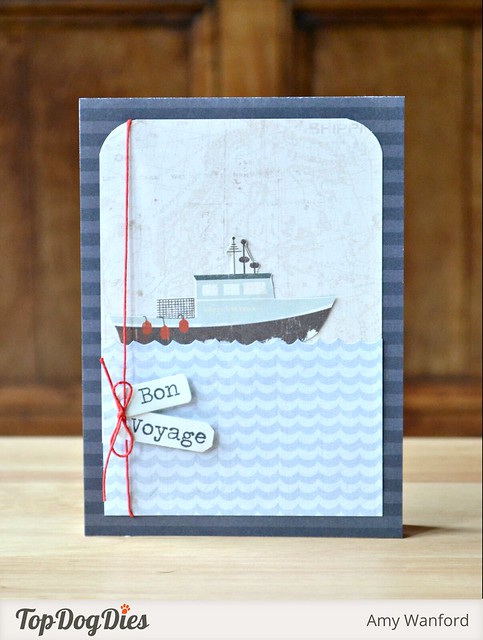
For my second project I used papers from the Anchored paper pad along with the new Top Dog Dies Mini Tags Die Set. I love how sweet and tiny these tags are! :)

Bon Voyage Close Up
    tips and tricks
  • The main panel of things card is built from three different 6x6 papers. The ship was cut from one design and placed on the map paper, and I fussy-cut the waves from another sheet. 
  • The tags were cut from the small border you very at the top of every sheet of paper in the pack. This coordinates perfectly with all of the papers used.
  • I rounded the top corners of the main panel to echo the round scallops of the waves. :)
Keep up to date with latest Authentique inspiration and prizes via their blog and Facebook. Also be sure to swing by the Top Dog Dies blog too because there's an amazing giveaway in which one lucky peep can win $50 worth of dies - enter here! In keeping with offers and prizes, Top Dog Dies are also having a special offer of 10% off $60 purchases or 15% off any purchases of $100!

As always, thank you so very much for stopping by today and thank you all so much for your votes in the competition to find the UK's best arts and crafts blog. Still can't believe this blog has been shortlisted in such a competition! Thanks so much for your votes - voting ends this Friday is if you like what you see here and haven't voted yet, then there's still time to vote here! ;)

That's all from me today. I need to get this birthday card delivered to my SIL!

Signature2

Tuesday, 26 November 2013

One Die, Three Ways...

Happy Holidays
Hey!

Happy Tuesday! I hope you all had a lovely weekend. It was a pretty chilly one here, but it gave me the perfect excuse to stay inside and whip up a few last Christmas cards (I wish I was as organised when it comes to Christmas shopping and decorating the place but I'm not! Can you believe it's now under a month until Christmas? Eeek!)

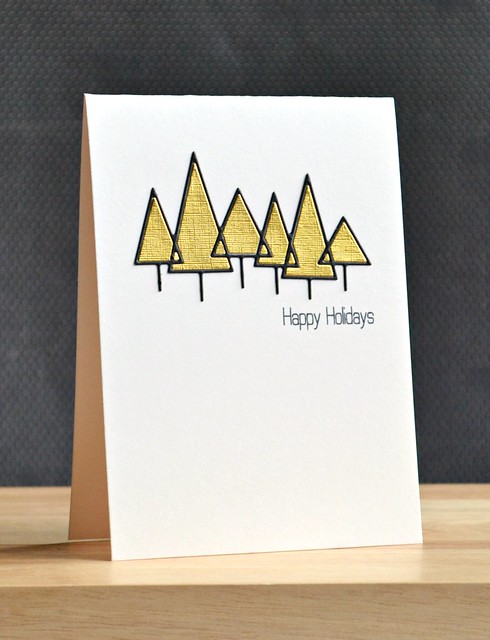
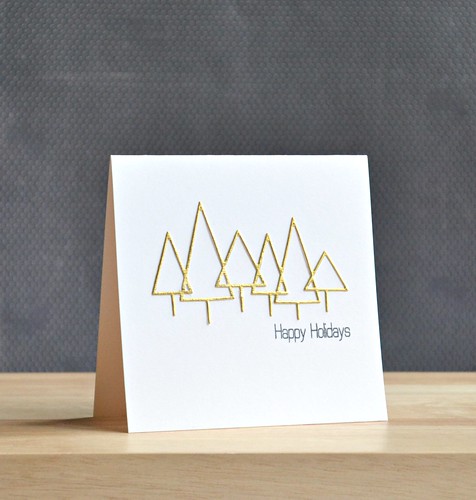
I purchased this Memory Box die the other weekend at a craft show. It was love at first sight. As soon as my crafty eye spotted this die, I had a flurry of ideas pop into my head. Purchase decision made! :)

So today I'm sharing three ways in which I've used this die. And there's not only three ways of course, I can think of more and I bet you can too!

First up, a bit of jigsaw fun with die-cuts. I simply die the trees from black and textured, gold card and popped the gold tree bits into the black outline. Really simple.

Hmmm...now what to do with the leftovers? Well I could have simply reversed the design, inserting the black tree bits into the gold outline, but I wanted to show how effective it looks to simply keep the outline alone on a design.

Happy Holidays 
It gives a nice embossed-like effect. It isn't my usual, favourite traditional holiday combo of red and green, but I like to think of this as a more 'classy' Christmas card. *wink*

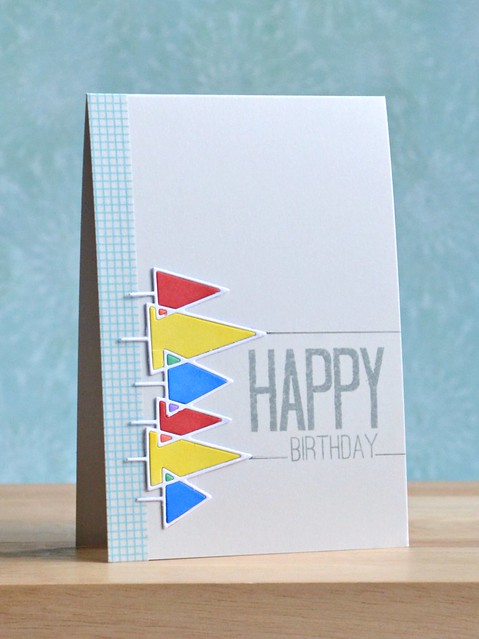
Now turn this die on its side and what do you get? Arrows of course! And if you can't see arrows, then you can certainly see a cool, kinda geometric embellishment. :)

Happy Birthday
Bonus points for using some washi tape! :)

tips and tricks
  • I can think of even more ways to use this die. Ideas include using it as a stencil and stamping through it, or applying embossing paste over it. Do you know that Memory Box do a coordinating background die for this shape too? I may need it...! :)
  • Notice that on the final card, I coloured the sections that overlap in the colour made from the two different coloured trees overlapping. E.G A red and a yellow tree overlapping results in an orange section.
  • Sticking the fine outline alone to a card can be fiddly. My trust glue pen came in handy here, but tiny dot of Glossy Accents will do the same trick.
Well there you have it. One die, three ways. I do love it when I can get penny's worth from my supplies. :)

Thanks so much for stopping by today!

Signature2
Products Used
The gold card is from my ancient stash of random card. However, I have included a link to gold cardstock as a good alternative.

Copyright/Disclosure

I am on various design teams and receive free product to use and promote. I geniunely love the products of the companies and all opinons are honest and my own.

I'm flattered if I've inspired you and you want to CASE anything of mine, but please don't enter it for commercial publications or competitions.
Thank You!
All designs, text, and photographs on Crafting Confessions are ©2009-2016 to Amy Gray unless stated otherwise.