Friday 8 May 2015

Creative forces unite!

Sugar skull bag
Hey!

Hooray for the weekend! It's started here now as I've got today booked off work to take a trip across to see my buddy Caryn as we head across to Port Sunlight for the Happy Stampers festival tomorrow. I can't wait!

But I'm guessing you're not here to check in with my weekend plans, you're here to see something crafty! I've been meaning to share this project with you for ages, but had to keep it top secret as it was a birthday present for my sweet friend (and fabulous colleague) Natalie!

Natalie's birthday was approaching recently and my talented friend and colleague, Vicky, and I were discussing what we could buy for her. After lots of ideas, we figured that seeing as we're both creative peeps, why not create something for Natalie from our heart? A gift that no-one else on the planet has in their possession. An exclusive piece of our crafty endeavours just for her! And so the idea was born to combine our skills and get busy.

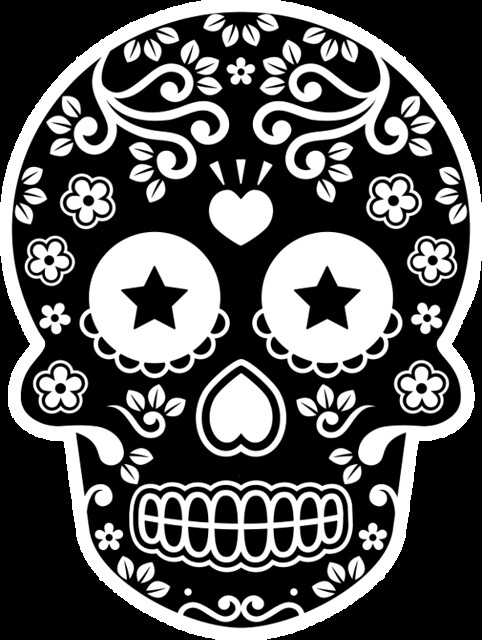
We knew that Natalie is a fan of Mexican sugar skulls and upon seeing some sugar skull wrapping paper in Paperchase, we decided that this had to be our theme. A little short of cash to send Natalie on an all-expenses paid trip to Mexico to celebrate Cinquo de Mayo, we opted to get busy with my Cricut Explore, some black glitter iron-on material and an image of a sugar skull.

Vicky, my technical, kick-ass teamie was challenged to find an image of a sugar skill that we could use. As a talented Art Editor this proved to be no problem for her and she gave me the following image to work with:

Skull

I think I got the easy part of the deal as I had to simply upload this file (ours was saved as a .png file) to my Cricut Design Space and click go! Here's how it's done just to show you how easy it is:

Step 1
I logged into the Cricut Design Space and clicked on upload image. I clicked on 'Basic Upload' as we were working with a .png file:


Step 2
I upload my file and clicked that this is a simple image to edit. A pure black and white image - it doesn't get much simpler!

Step 3 
I then edited the image by clicking on all of the white areas of the design to remove them and make them transparent. I need these to be negative spaces for the cut lines to be on the edges of the black areas.


Step 4 
The next step shows how the image will cut before saving it. The red lines are the cutting lines. You have the option to go back and make further changes if you need to, or if you've missed an area.


Step 5
Then I saved my image and inserted it by finding it at the bottom of the 'Upload Images' tab (along with others I've uploaded and  used in the past!)


Step 6
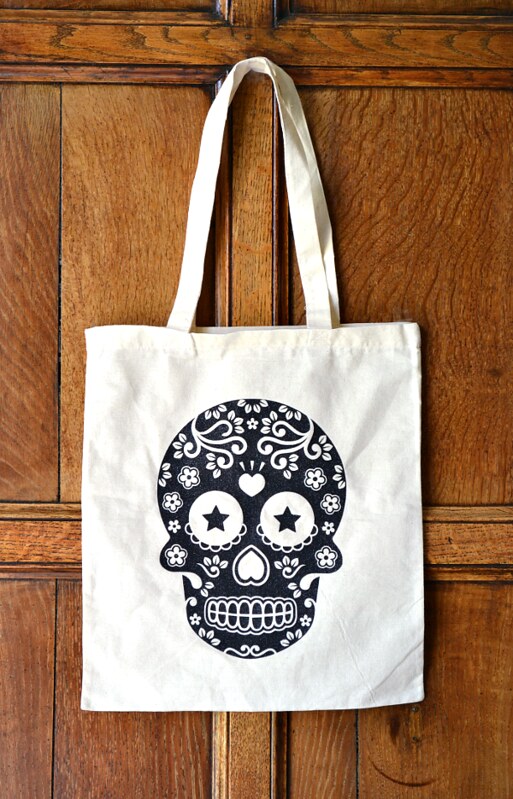
Here's the image ready to work with. I simply changed the size of it for the canvas bag - so easy! Just remember that if you're working with iron-on material and your design is not symmetrical you'll need to click the mirror-image box after clicking on the 'Go' button. :)


Then it was a simple case of ironing this onto a canvas bag and the job was done! A creative present that Natalie liked so much that she wants to frame it rather than use it! Well, that's what she's told us anyway, I hope it's not because she doesn't like it! ;)

Creative forces unite! Vicky and I made a pretty good team and the best part was that this image was FREE! Yup, remember that you can upload your own .png and .svg files for your Cricut Explore to cut for free. Total bonus!

Well, that's all from me today as it's time to drive across the peaks to the Wirral for a good catch-up with a good friend! I hope you have a lovely weekend!

Signature2

Tuesday 5 May 2015

Cute clouds, sparkly rain and shiny umbrellas...


Rainbow
Hey!

Woo hoo! I don't normally get too excited about going back to work after a bank holiday (although I do love my job!), but I do when it coincides with release day at Clearly Besotted! The new release is available to purchase from 10pm tonight (UK time) and you can get a full view of the goodies and make your shopping list over at Stephanie's beforehand. :)

Sorry the Blogger gremlins were around for the bank holiday and kept some of my sneak peek projects behind. I was away with family and friends at the time but fear not, it just means I can share them with you later.

Today's card features a combination of fun mini sets additions. Cue cute clouds from Sky's the Limit Additions set and a super-sweet umbrella from the April Showers Additions mini set. The good news is that these sets co-ordinate with the dies from the original sets and if you haven't already got the original sets in your stash, I hope that my card shows that you can have lots of fun with just these mini sets in the meantime. :)

Rainbow close up

I also couldn't help but smother that umbrella with Glossy Accents. :)

Well that's all from me today but if you haven't already, please pop across to Stephanie's (aka CB HQ) for some inspirational projects and a good nosy at the full release. Happy shopping! :D

Thanks for stopping by here today!

Signature2

Saturday 2 May 2015

HOORAY!

Hooray
Hey!

Hooray for the weekend! Hooray for the bank holiday weekend (for us UK peeps)! Hooray for the sneak peeks of the new Clearly Besotted release!

Yup, it's time to celebrate for a number of reasons today and this card celebrates some new Clearly Besotted goodies coming to you from Tuesday 5th May at 10pm UK time. I'm super-duper excited about the release this month as Clearly Besotted has teamed up with my very sweet and talented friend Lucy Abrams to bring you some dies that will make shaker cards easy peasy lemon squeezy!

Lucy is the queen of shaker cards and is now giving us all the chance to shake in style with her beautiful Sparkly Shaker Selection packs in a plethora of colours combined with these new dies. I used the HOORAY die for today's card - you can simply die-cut this and leave it as it is but I couldn't resist die-cutting it again from black cardstock and trimming the sentiment to really make it pop against the yummy yellow American Crafts Shimelle paper.

Hooray close up

The sentiment below the HOORAY is a sneak peek of the new set, My Hero. This set focuses on celebrating the guys, but the co-ordinating sentiments such as this one are perfect for celebrating anyone!

tips and tricks

  • I use sheets of fun foam to whip up shaker cards quickly. I simply die-cut a piece slightly smaller than the yellow piece to place underneath and cut the 'HOORAY' from the design as I need those pretties to shake all over the aperture. 
  • I didn't waste the sentiment cut from the fun foam panel as I mounted it on top of the sentiment and then added a black die-cut sentiment on top smothered with Glossy Accents. It adds real dimension and fun to the design. :)
  • Although you might be tempted to place the additional sentiment below the aperture so you can see all of those shiny sequins, tucking it underneath the 'HOORAY' keeps the design centred and the eye focused on the shaker element with ease. 
Well, that's all from me today. We've got a busy bank holiday ahead of us with visiting family and friends and of course, sharing more Clearly Besotted sneak peeks with you too! Can't wait until tomorrow? Then pop across to Stephanie's at CB HQ for even more sneaky peeks and also welcome our guestie, Rebecca Hoy, back on board for more CB fun!

As always, thank you SO MUCH for stopping by today. Your visits are always appreciated!

Signature2

Copyright/Disclosure

I am on various design teams and receive free product to use and promote. I geniunely love the products of the companies and all opinons are honest and my own.

I'm flattered if I've inspired you and you want to CASE anything of mine, but please don't enter it for commercial publications or competitions.
Thank You!
All designs, text, and photographs on Crafting Confessions are ©2009-2016 to Amy Gray unless stated otherwise.