Wednesday 23 July 2014

Kid's got a brand new bag....

Emilie bag
Hey!

I told you I'd be back with something crafty this week and here it is. Albeit a previous project I'm yet to share with you, but it still counts, right? ;)

Over the past few months I've been on an exploring adventure with my Cricut Explore and found a reason to enjoy some time ironing. I know, you heard me right. This machine, once teamed up with Cricut Iron-on material, has me loving ironing. I never thought I'd say those words. Ever.

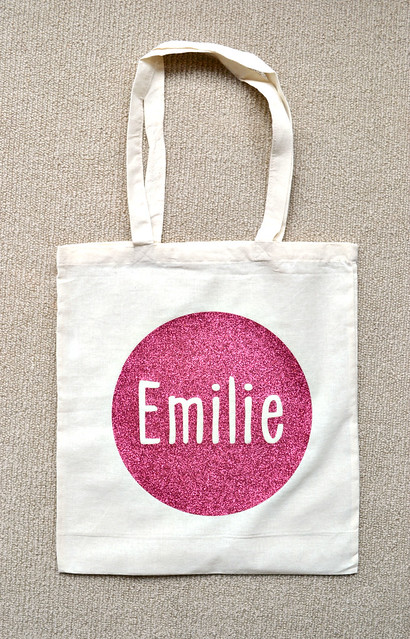
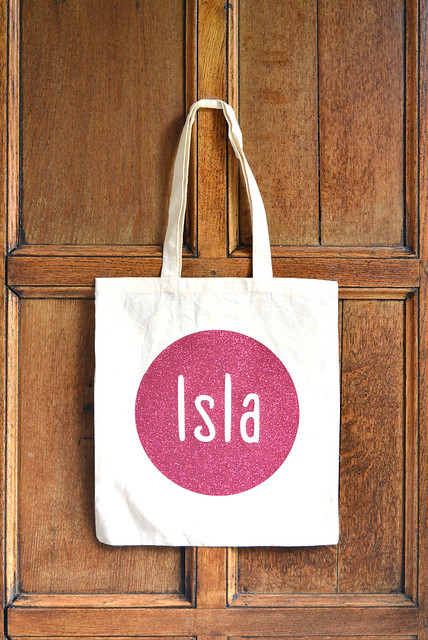
We've celebrated a few special occasions that the Cricut Explore has catered for perfectly. I decided to create some personalised tote bags to celebrate my guy's goddaughter's first birthday. Nothing but pink glittery sparkles for the special little lady. :)

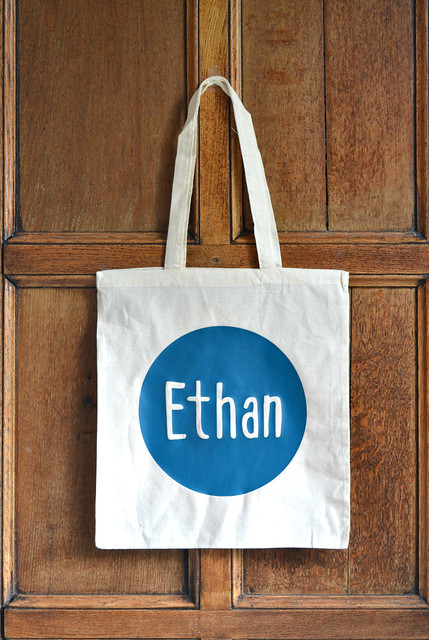
So impressed was I at the ease of creating the design, that I tweaked it to celebrate the arrival of our friends' baby boy.

Noah

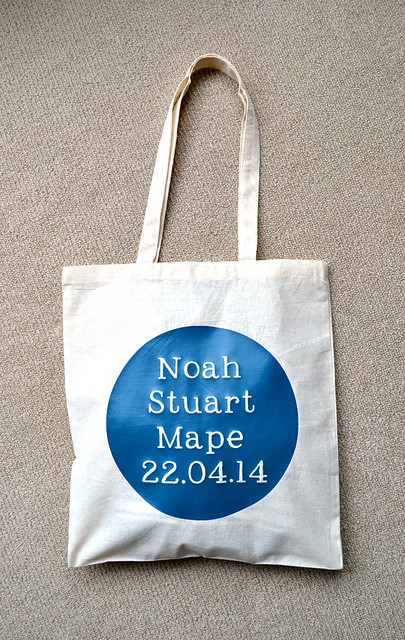
I though this tote made a sweet way of presenting the gift we'd bought the happy parents. It literally took minutes to make which is always a bonus as this was a last-minute idea of mine. :)

I was surprised a few weeks ago to receive a request from our friend to create two more bags for her to give to her friends' children as gifts. I think it's safe to share them on here now - it was probably safe to share them as soon as I made them but you never know who may be peeking at your blogeroo. For those of you who follow me on Facebook, Twitter or Instagram you may recognise these bags as I snapped them during the creative process on the ironing board. :)

Isla

Ethan

It was just a case of opening up the previous design I'd saved on the Cricut Design Space software and chaining the names. The only thing I had to double-check is that I'd spelt the names correctly. I had. Phew!

That's all from me today, thank you so much for visiting and I hope I've managed to show you that ironing can be fun. Well, fun when it's in the name of creating anyway! ;)

Signature2


Products Used


Thursday 3 July 2014

Faux Watercolour Roses

sweetroses
Hey!

I'm finding it hard to believe it's July already - the months are zooming by before my very eyes! But a new month means some new goodies from Clearly Besotted Stamps - yay! So cue a sneaky peeky post today of a fabulous new set available for purchase from Saturday 5th July at 10pm BST (UK time)

Today I'm giving you a sneaky peek of what I think is my new favourite set, Sweet Rose (Shhhhh! Don't tell the other sets!) I decided as soon as I saw the set that I wanted to play with my Distress Inks to create a soft, watercolour effect. The result from the solid rose stamp was simply stunning, I think I gasped aloud! It honestly makes you look like a true artist and the result is soooooooo easy to achieve.

Sweet Roses Close up

I then went ahead with more Distress Inks to paint the water in the jar and the surface. Again, you don't need to be an amazing artist to achieve the effect and that's the total bonus. I almost felt like I was cheating as I created this little scene.

sweet roses close up2

tips and tricks

  • I used watercolour paper to stamp on to, this soaks up the water and Distress ink way more than regular cardstock and helps maintain the lines of the solid stamp.
  • In order to achieve the watercolour effect on the solid rose, I simply inked up my stamp with Distress Ink, lightly spritzed it with water and stamped it once on scrap card before stamping it again on my watercolour card.  I then added a touch more shading with the same colour Distress Ink picked up with a damp paintbrush.
  • The stamp set comes with stems and leaves but I wanted to keep mine simple so I faintly drew a stem with a pencil and went over it with a wet paintbrush with green Distress Ink. Once it dried, I gently erased the pencil lines. 
Just one more close up shot of those roses. It still amazes me how easy this look was to achieve with that stamp!

Sweet Roses Close up3

Well I hope to have more sneaky peeks in the coming days, but for now I recommend you pop across to Stephanie's for more peeks from her, the fabulous design team and our guestie for the month - Jen Nelson!

Right. Must dash. Thanks so much for visiting today!

Signature2

Copyright/Disclosure

I am on various design teams and receive free product to use and promote. I geniunely love the products of the companies and all opinons are honest and my own.

I'm flattered if I've inspired you and you want to CASE anything of mine, but please don't enter it for commercial publications or competitions.
Thank You!
All designs, text, and photographs on Crafting Confessions are ©2009-2016 to Amy Gray unless stated otherwise.