Tuesday, 26 November 2013

One Die, Three Ways...

Happy Holidays
Hey!

Happy Tuesday! I hope you all had a lovely weekend. It was a pretty chilly one here, but it gave me the perfect excuse to stay inside and whip up a few last Christmas cards (I wish I was as organised when it comes to Christmas shopping and decorating the place but I'm not! Can you believe it's now under a month until Christmas? Eeek!)

I purchased this Memory Box die the other weekend at a craft show. It was love at first sight. As soon as my crafty eye spotted this die, I had a flurry of ideas pop into my head. Purchase decision made! :)

So today I'm sharing three ways in which I've used this die. And there's not only three ways of course, I can think of more and I bet you can too!

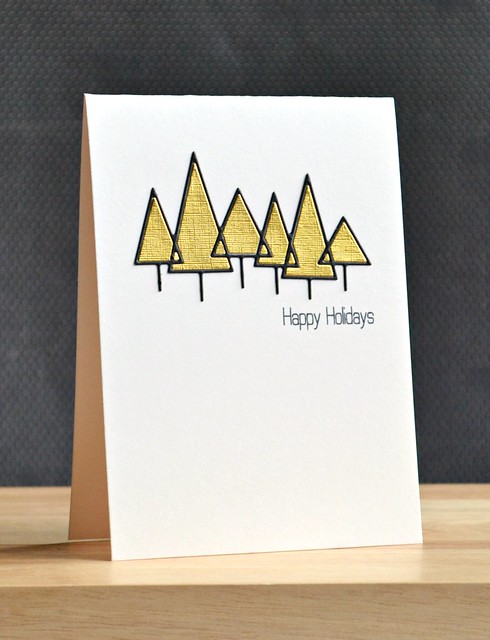
First up, a bit of jigsaw fun with die-cuts. I simply die the trees from black and textured, gold card and popped the gold tree bits into the black outline. Really simple.

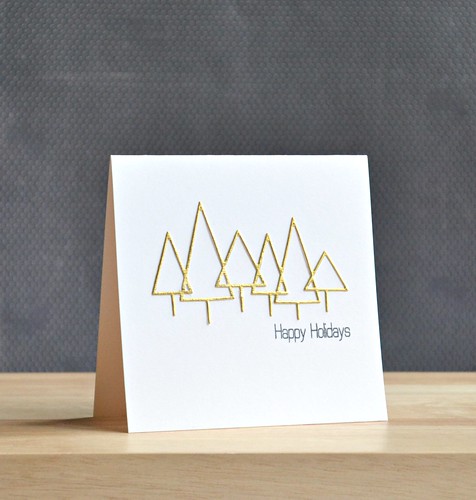
Hmmm...now what to do with the leftovers? Well I could have simply reversed the design, inserting the black tree bits into the gold outline, but I wanted to show how effective it looks to simply keep the outline alone on a design.
Happy Holidays 
It gives a nice embossed-like effect. It isn't my usual, favourite traditional holiday combo of red and green, but I like to think of this as a more 'classy' Christmas card. *wink*

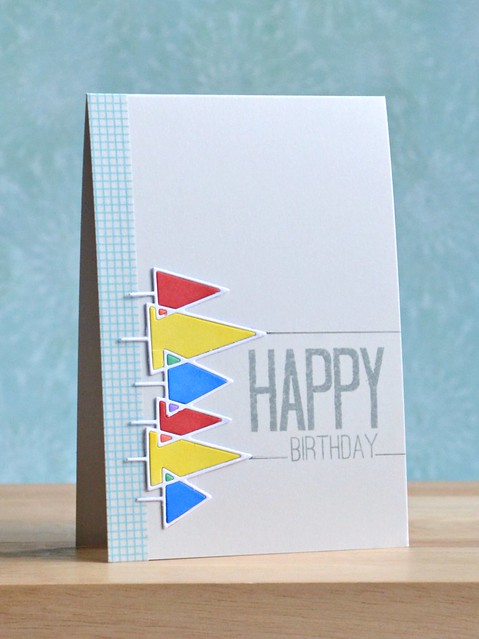
Now turn this die on its side and what do you get? Arrows of course! And if you can't see arrows, then you can certainly see a cool, kinda geometric embellishment. :)
Happy Birthday
Bonus points for using some washi tape! :)

tips and tricks
  • I can think of even more ways to use this die. Ideas include using it as a stencil and stamping through it, or applying embossing paste over it. Do you know that Memory Box do a coordinating background die for this shape too? I may need it...! :)
  • Notice that on the final card, I coloured the sections that overlap in the colour made from the two different coloured trees overlapping. E.G A red and a yellow tree overlapping results in an orange section.
  • Sticking the fine outline alone to a card can be fiddly. My trust glue pen came in handy here, but tiny dot of Glossy Accents will do the same trick.
Well there you have it. One die, three ways. I do love it when I can get penny's worth from my supplies. :)

Thanks so much for stopping by today!

Signature2
Products Used
The gold card is from my ancient stash of random card. However, I have included a link to gold cardstock as a good alternative.

Wednesday, 20 November 2013

A 'Dashing' Card

Happy Holidays
Hey!

OK. Apologies. This card is being shared a wee bit later than originally intended. Technical glitches and a love/hate relationship with Blogger are the main causes but let's not dwell on it. *wink*

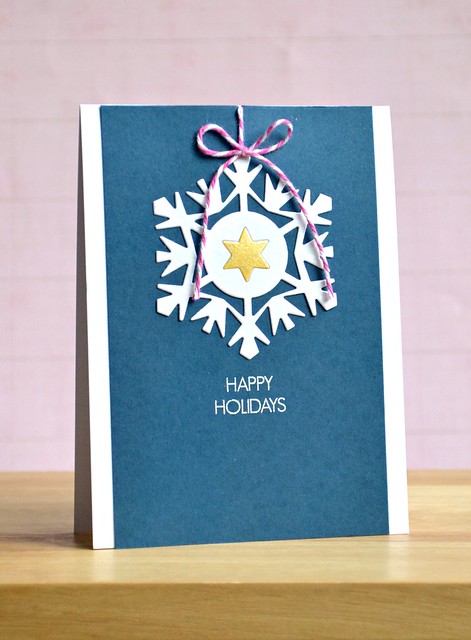
The title of today's post refers the word 'dashing' as a verb and not a noun. Yup, I was crazy enough to try out yet another Craft Dash Challenge. That is, to create a project in 10 minutes or less based on this colour combo:


I think I was a little ambitious in heat embossing and playing with twine on a card with a time restriction, but I still came in at 8 mins 47 seconds. The most time was spent tying the bow and attaching it to the card!

Another reason I joined in the fun of this challenge is because Uniko Studio are sponsoring it. Get lucky and you could win yourself a £15 store gift certificate! :)

For the full deets on the challenge and to get some inspiration, please pop across to the challenge blog.

Keeping it super short and sweet as I'm already super late in sharing this project with you! Apologies again for that. I'm really hoping that Blogger and I can establish a better working relationship in the future! :)

Signature2

Monday, 18 November 2013

A Snowflake Wreath...

Let it Snow
Hey!

Happy Monday! It may be freezing outside and you too may be grumbling as you have to scrape the ice off the windscreen before heading out, but here's one bit of happiness for you: it's time for another Uniko Studio Challenge! :)


This month's challenge is very appropriate if your morning is anything like mine today. We're looking for winter sparkle in your creations.

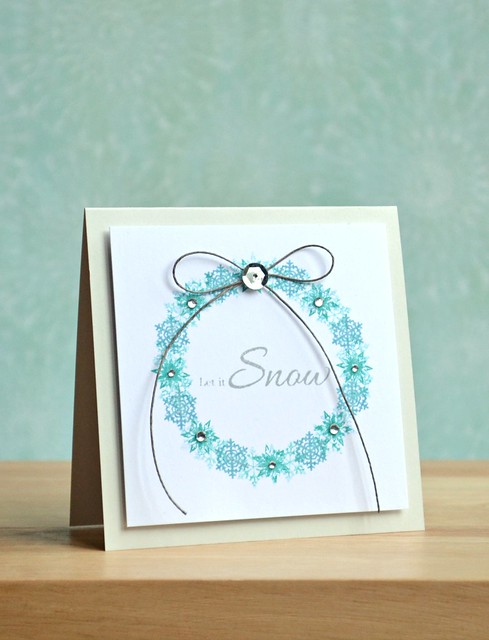
I'm still happily stamping Christmas cards (I'm not quite at the procrastinating stage yet!) so winter and sparkles came to me in the form of a wreath. A snowflake wreath to be exact. :)

tips and tricks

  • My wreath was stamped by lightly tracing a circle as a guide and stamping various snowflakes in various shades of blue Distress inks around it.
  • If you use pigment inks for this, you'll want to be careful when you erase the pencil-drawn circle as these inks can smudge. If in doubt, test on scrap paper first. :)
  • I purposely kept the twine bow tails super-long to frame the sentiment and for more interest. That sentiment looked a little lost on its own there.

For the full deets of the challenge, and to see what the rest of the Uniko Studio DT created, be sure to check out the Uniko Studio blog.

I'm really hoping today's card is not a sign of things to come. Wintery showers have been predicted and as much as I love the white stuff, I only love it when I don't have to drive on it!

Thanks so much for stopping by today! :)


Signature2


Products Used


Monday, 11 November 2013

Getting distressed (and messy!)....

snowflakes blizzard
Hey!

Happy Monday! C'mon, look at the bright side: with every moment you spend reading this post, you're heading closer and closer to the weekend. Yup, that's my philosophy on Mondays. Ha!

I'm here today with a card for the Uniko Studio Blog Hop. This is no ordinary hop though, it's the last one of 2013 and so Christmas may have come a little bit early as we get to give away the sets we're featuring for it, or some store credit to one lucky commenter! You should have hopped over here from the Uniko Studio blog. Be sure to start there if you haven't!

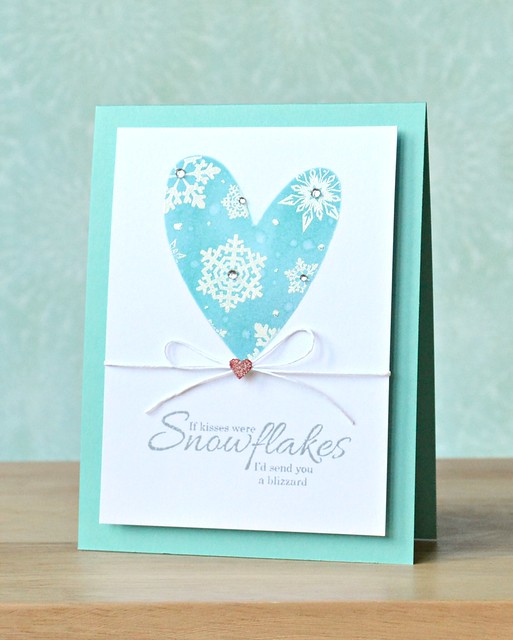
The set I'm featuring today is Stunning Snowflakes. This set does not only feature snowflakes, but some pretty sweet sentiments too. This sentiment really jumped out at me, and as soon as I saw it, I knew it had to be the sentiment for my guy's Christmas card.

I've been so very inspired by Jennifer McGuire's snowy sky technique with Distress inks after seeing Debby Hughes rock it here. So one of my crafty purchases at a craft fair on Saturday was a few Distress Inks in various shades of blue. (Check out my Twitter or Instagram for a pic of my loot from the day if you're interested!)

Well I was a little nervous. I'm not usually a messy crafter. But I can say that I LOVE this technique! I only wished I had some Perfect Pearls in the right colour to finish it off, but I added my own sparkles in the form of gems and dots of dazzle with my new Wink of Stella pen. If you've not got your hands on one of these, you need to. Seriously. Sparkles galore! :)

Embossed snowflakes in white over the top of my masked ink heart finished off the focal point. It shimmers and sparkles way more IRL.

tips and tricks
  • This design doesn't only work for someone you want to send lots of kisses to! Simply change the sentiment or masked shape to suit a different recipient.
  • Any missed white embossed areas can be easily fixed up with a white gel pen. :)
  • I'm going to confess a 'boo boo' here: I stamped the sentiment far too low and it looked terrible! The design didn't flow, the eye didn't know where to look! However, a simple bit of twine treatment helped the design to flow better. You can rescue most 'boo boos' in my book! *wink*
Ready for the fun part? I have a £10 Uniko Studio Gift Certificate to give away to one lucky commenter. If you want to be in with a chance of winning it, please leave a comment by Thursday November 14th and I'll randomly pick a winner.

Next on your hopping adventure is Amber! :)

Signature2

Products Used

Copyright/Disclosure

I am on various design teams and receive free product to use and promote. I geniunely love the products of the companies and all opinons are honest and my own.

I'm flattered if I've inspired you and you want to CASE anything of mine, but please don't enter it for commercial publications or competitions.
Thank You!
All designs, text, and photographs on Crafting Confessions are ©2009-2016 to Amy Gray unless stated otherwise.