Tuesday, 31 December 2013

2013: That's a Wrap!

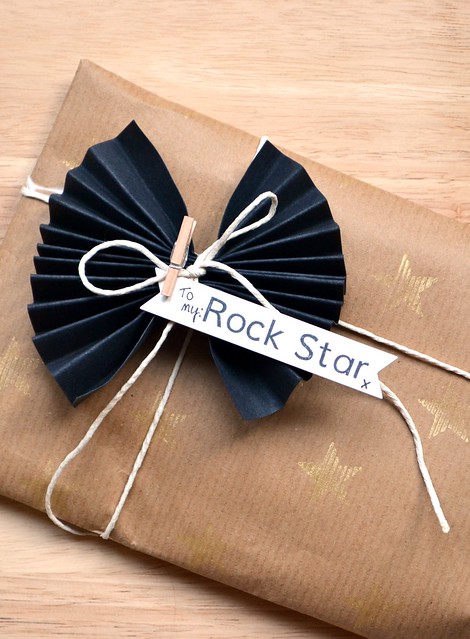
Rock Star
Hey!

Happy New Year's Eve! For some of you, it may be 2014 already, but here it's the final day of 2013. So in order to 'wrap up' 2013, I thought I'd share some of my Christmas wrapping with you. A very literally take on wrapping things up. :)

I decided to make a bit more of an effort when it came to wrapping up my guy's presents this year and have plenty of inspiration from my Pinterest board. So I got out a few Clearly Besotted Stamps goodies, some gold ink, and some other bits 'n' bobs and played.

The accordion-folded bows are so easy to make: simply fold a piece of card like you're making a fan, tie a piece of string around the centre and fan the ends out.

Geek

I decided that I'd create name labels even though all the presents are for Chris - I like that extra personal touch. :)
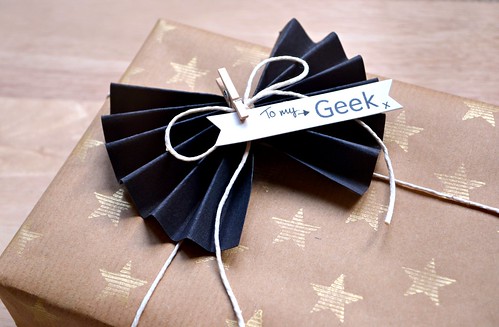
Geek Close Up

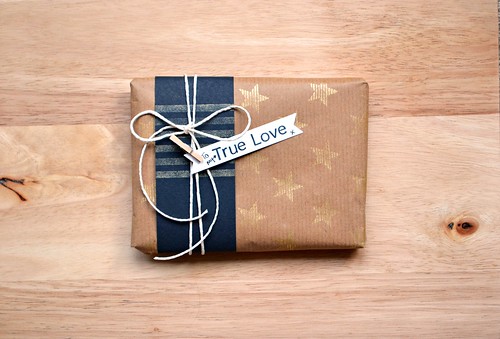
For those smaller presents, I simply wrapped a piece of black card around the gift as the acordian-folded bow was a little too big.
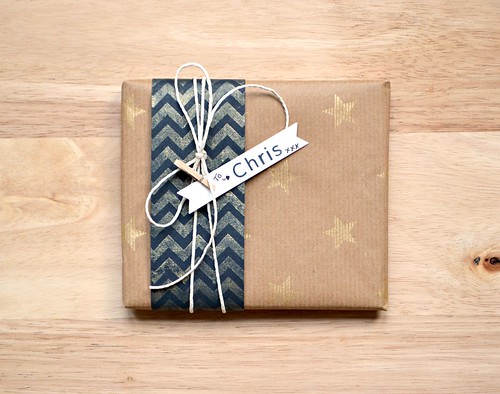
Chris
Each band of black card was stamped with a pattern in the same gold ink used on the wrapping paper.

True Love

tips and tricks
  • I pre-cut the paper for each gift and then proceeded to stamp the stars in gold ink randomly. This saves the daunting of task of thinking you have to stamp a HUGE sheet of parcel paper in one go! :
  • The accordion bows can be created to any desired size, it simply depends on the size of the sheet of card you start with. To create a rosette embellishment, simply fold a longer length of card and secure the ends together. 
If you're dying to know what's inside each lovingly wrapped gift here goes:
  • Guitar-shaped salad spoons (Because he rocks in the kitchen as well as on stage!)
  • A chocolate version of a Spectrum keyboard
  • A phone case disguised as a secret service envelope
  • The new Bastille album - Bad Blood (I think I may listen to that more than Chris - love it!)
But there was one gift that I didn't dare wrap up:

Image Source: KD7LMO.net

A clock created from recycled valves, nixie tubes, from the 1950s. Far too fragile to wrap up and transport to my guy's parents' where we celebrated Christmas. You can see the one I purchased for him in action here.

Well that's a wrap from me, literally! Wishing you all a very Happy New Year! Here's to 2014 *clink!*
Signature2


Products Used

(Products listed do not include parcel tape, basic string and mini pegs.)


Tuesday, 17 December 2013

A Geometric Christmas Tree...

Modern Tree
Hey!

Well it's the final full week before Christmas and the final week before I finish for the holidays. I have a ton of work to do and a ton of things to do before the 25th. The only thing I know for sure though is that Christmas is coming whether I'm ready or not! 

I'm still creating Christmas cards. Turns out that I've totally underestimated the amount I need and I've had a few last minute requests. However, today's card is one that is already on it's way somewhere as I was organised and posted my international Christmas cards last week. :)

Now Christmas has come a bit early for me. I've already received my present which was a shiny new phone. The only reason I received it so early is because I've been such a good girl this year my old phone broke and well, I'm going to be honest here, I'm totally lost without a data connection by my side at all times. Ha!

So why am I babbling on about an early Christmas present? Well because it totally inspired this card. The Motorola Assist logo sparked a Eureka! moment that I couldn't pass up on:

Source: Google Play

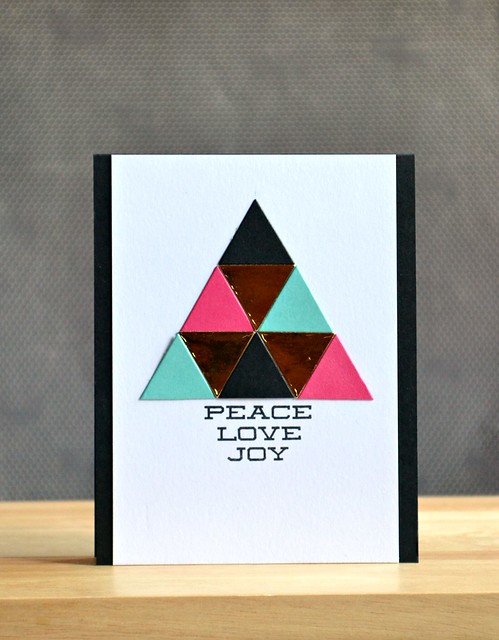
Hello, geometric Christmas Tree! :)

Modern Tree2

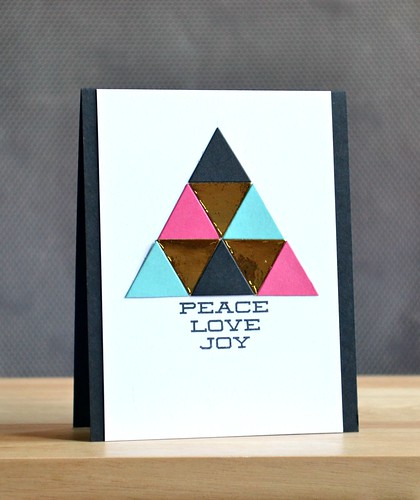
It's pretty easy to see how this inspired me, right? I changed the colours and added a touch of gold - trying to keep it trendy here! What made the design super easy was being able to die cut my triangles using the triangle die from the Clearly Besotted Stamps' Geometric Style Collection. The hardest part was choosing the colours!

tips and tricks
  •  The font matches the modern, graphic design of the tree and each sentiment is purposely stamped in this form to make it appear like a bucket underneath the tree. To stamp centrally, I always like to mark the centre of the card lightly with a pencil before stamping.
  • The cool blue and hot pink compliment the modern design but the world's your oyster when it comes to colours. Experiment! 
  • Why not try using up your patterned paper scraps and make your own patchwork style tree?
That's all from me today. I'm off to the post office today to get the rest of my cards out and no doubt make a few extra ones later tonight!*wink*

Signature2


Products Used
(N.B The gold card is from my stash that I've had for years! I haven't got a link for it sorry!)


Sunday, 15 December 2013

Snowflakes. Squint and you might see some!

Let it Snow
Hey!

Happy Sunday! If you're anything like me, today you're starting to let the panic start to set in that you've done hardly anything for the holidays yet....! Eeek!

Worrying aside, I'm here today to share that I'm playing along with those talented Curtain Call Challenge gals as a guest designer. Thanks so much to Stacey for asking me to share the stage today!


 So today's card was inspired by this piccy for today's Sweet Snowflakes Curtain Call Challenge:

Photo Credit: akeptlife.blogspot.com

I was taken by the blue and pink colour combo and decided upon blue snowflakes and pink, glossy hearts. The winter daylight is doing my photography no favours here so sit up close to that monitor, squint, and squint some more and you just might be able to see some snowflakes falling from that cloud. :)

OK. Stop squinting. Here's a close up, but it's not much better I'm afraid!

Let it snow (close up)
I think you're just going to have to trust me that you can really see these pretty snowflakes much better IRL!
tips and tricks
  • To add a bit of extra dimension, I've covered my hearts with Glossy Accents and smothered my cloud with my clear Wink of Stella pen.
  • To add Glossy Accents to tiny embellishments easily, I like to stick them to a tiny piece of blu-tack so they don't stick to the table!
  • The design looked lost on a larger piece of cardstock, so I've created it on a smaller piece and mounted it on an extra layer.
The challenge is sponsored by Uniko Studio so it seemed rude not to ink up my Uniko Studio Stunning Snowflakes stamp set for it. The LEAD of this challenge will win a gift certificate to spend at the Uniko Studio store too. :)

Be sure to see how the special guests and crew inked up Stunning Snowflakes too. I'm pretty sure you'll be able to see their snowflakes without risking square eyes! *wink*

Sweet Snowflake Designers
Beverly Brown, Uniko Studio
Amy Wanford, Guest Designer (You're here!)
Amber Kroening
Barb Murphy
Christina MacLaren
Gayatri Murali
Kim Singdahlsen
Laurie Willison
Marisa Ritzen
Maureen Plut
Monika Davis
Sheri Gilson
Stacey Schafer
Tenia Nelson
Tracey McNeely

And of course, come and join in the sweet snowflake fun with us! If you're like me, you've got a ton of Christmas crafty projects to whip up still here's your perfect inspiration point!

Right, must dash, so much to do still and so little time!

Signature2


Products Used


Wednesday, 11 December 2013

Love You (but I'm saying goodbye)...

love you
Hey!

Happy Wednesday! Happy release day, Uniko Studio! Yup, the two new sets that my fellow DT and I have been sharing for the past two days (here and here) are available to purchase N.O.W! :)

Ooh and there's a deal on for today only:


As always, we're celebrating release day with a good ol' blog hop. You should have hopped along here from the Uniko Studio Blog so if you haven't then be sure to start out there.

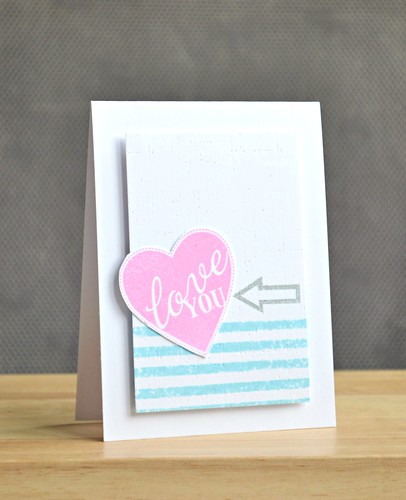
I felt that I owed a bit more inky love to the new set, 'Always & Forever' seeing as I only shared a teeny heart and a partially inked sentiment from it yesterday! So here we have one large heart from the set. A total 180 from the masculine style projects of the past two days and super sweet in pink with sherbet-esque shades of colour. :)

tips and tricks
  • I used Distress Inks on the stripes of the design and this gave a more textured, uneven impression. I like to think that the fact it's not evenly stamped adds a bit of texture. :)
  • I debated for far too long on whether to attach the heart straight or at an angle. I let my crazy, care-free side win out on this one. I'm hoping it adds a bit of fun to the design.
  • I prefer to use pigment ink on large solid designs if I want an evenly inked impression. For a guaranteed good stamp, I like to place a sheet of foam underneath. 
That's just about everything from me today, but before you hop along to Amber I have some news to share. You've probably guessed already from the title of today's post, but I've made the decision to step down from the Uniko Studio DT. I've been with Uniko Studio since day one and I'd like to thank Bev for having me on board for so long. It's been fun and I've been lucky enough to be surrounded by a lovely DT. It's sometimes tough saying goodbye, but the real world outisde of this wonderful hobby is calling me to step up and if I keep burning the candle at both ends I'll be burnt out!

Now before we get a little too sentimental and tearful, I'm going to send you off to hop along to Amber. :)

Signature2


Products Used
(I'll add the newly release set, 'Always & Forever' when I can. Check out the Uniko Studio store if you can't wait!)

Copyright/Disclosure

I am on various design teams and receive free product to use and promote. I geniunely love the products of the companies and all opinons are honest and my own.

I'm flattered if I've inspired you and you want to CASE anything of mine, but please don't enter it for commercial publications or competitions.
Thank You!
All designs, text, and photographs on Crafting Confessions are ©2009-2016 to Amy Gray unless stated otherwise.