Tuesday 30 April 2013

For the guys (and the gals!)

Thinking of You
Hey!

So I'm busy this week studying. I love to learn so I'm not complaining, and I'm especially not complaining when it's a card class! :)

Yup, the His & Hers online card class started on Monday and boy, am I  glad I signed up after only Day 1! I'm a girl with a lot of guys in my family, so I'm hoping to build up a stash of guy cards and maybe - just maybe - conquer that little bit of fear I experience when I have to create for a guy!

Day 1 was all about the simple 'Thinking of You' card. The idea is to use a technique, product, sketch etc and make it cater for both the guys and the gals.

Kristina Werner featured a great sketch that I couldn't resist and both Jennifer McGuire and guest designer, Lisa Spangler featured the same products for their cards. Jennifer also featured an awesome technique that I hope to use later on...*wink*

So armed with a sketch and a stamp that I wanted to use on both cards, I got busy.

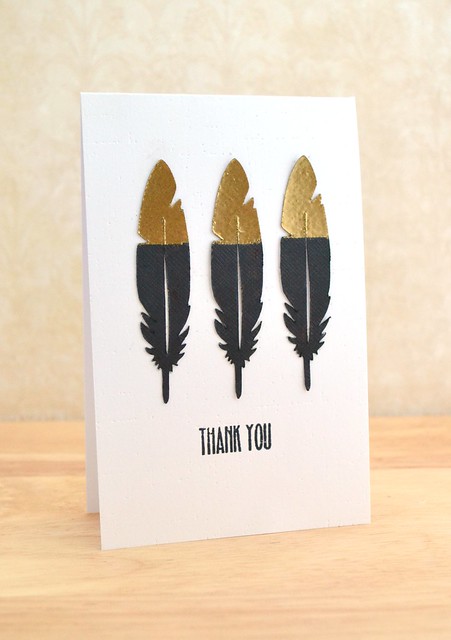
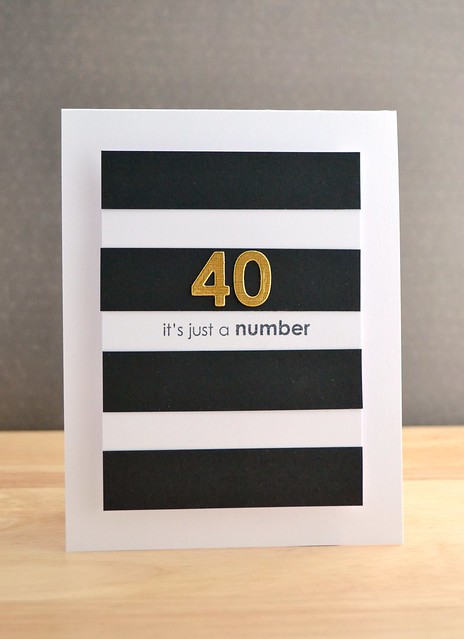
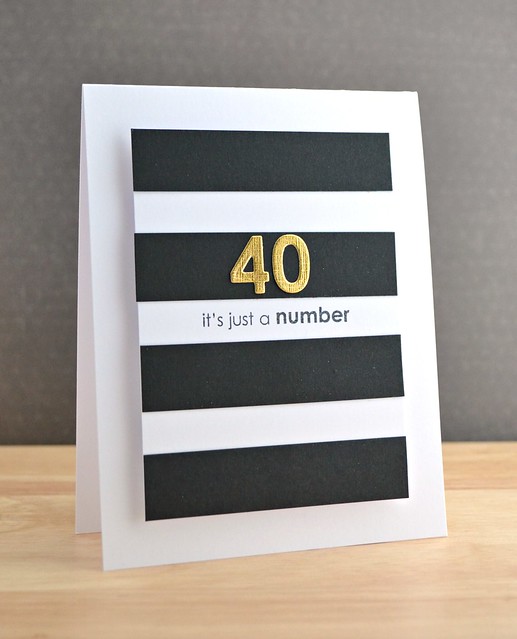
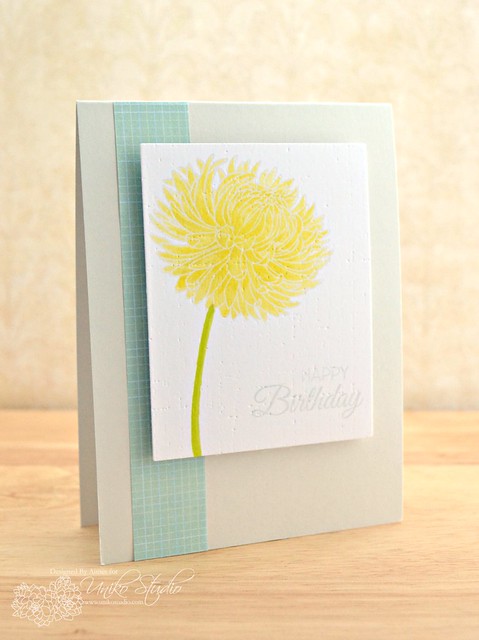
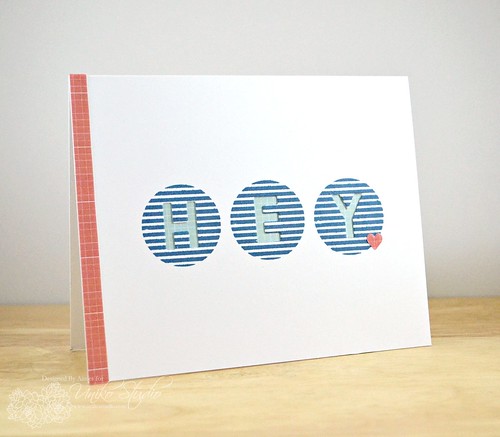
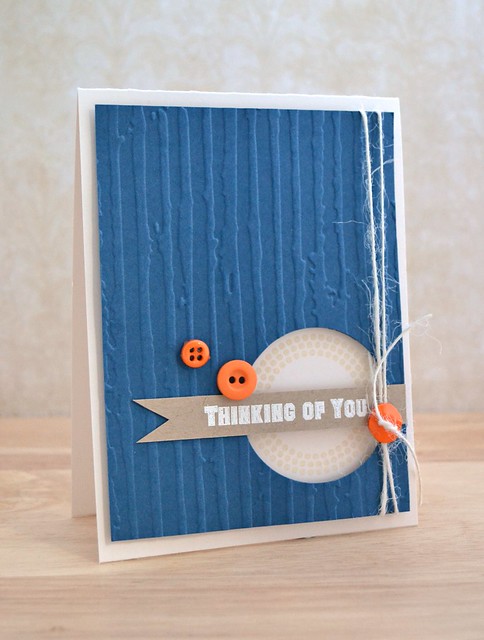
The card at the top is my guy card (I hope you can tell it's a guy card) and this card below is my gal card:

Thinking of You

Now I thought I'd be struggling with the guy card, but it was actually the gal card that had me scratching my head and walking away for cups of tea! What can I say? The course must be conquering that fear of mine already - ha!

As always, thank you so much for stopping by this little corner of Blogland. Hoping to be back soon with some more guy cards (and gal cards of course!)

Signature2


Products Used

Monday 29 April 2013

Trendy Feathers....

Feather Thank You

Hey!

Happy Monday! I'm zooming by today to let you know that I have a little exciting post on the Paper Crafter's Library as their Featured Designer. Be sure to check it out if you wanna see a project that I've not shared on here yet! :)

Today's card is one I've shared over there too, and features some gorgeous, trendy feathers that I've cut using the Southwest cartridge and my Cricut Mini.

tips and tricks
  • If you're cramped for space and have to pack away your electronic cutter when you're not using it (like me!) plan ahead and cut in bulk.  I cut loads of these feathers, in various sizes, from white cardstock. They now sit on my desk and I can simply colour them with an alcohol marker to have coordinating embellishments on demand!
  • Heat embossing isn't only for stamped images. I tapped my embossing ink on the tips of these feathers and covered in gold embossing powder to give those trendy feathers more 'oomph'! :)
I hope you can pop across to the post if you have time...  :)

Right, I must dash as I've got day at work and I'm also about to start the His & Hers Online Card Class later on, so I better get prepared as it starts today! Cue lots of cards for the guys to be created this week (fingers crossed!)

Signature2

Tuesday 16 April 2013

It's just a number...

40 front
Hey!

I hope you've had a happy weekend. It's certainly starting to feel like spring has sprung around here and it couldn't come soon enough. Hello, sunshine! :)

But enough about the sunshine, how about some shiny card instead? It was my SIL's birthday the other weekend. Not just any birthday. A BIG birthday. Cue one of my favourite sentiments for the big birthdays and some shiny card (I know, it's gold. Again!) for a super quick CAS card that's a little sassy and a little cheeky too *wink*

tips and tricks
  • Stripes are so on trend right now. For my stripes I wanted thicker black stripes to accomodate the '40' and thinner white stripes to accommodate the stamped sentiment. I also knew that I wanted the top and bottom to be a black stripe. It takes a little bit of maths, but it's worth the brain-ache to make it fit!
  • Play with your scraps! The gold card is actually a scrap from this project. I had it lying on my desk and little did I know that it would actually end up shining in the spotlight of another project. 
The texture of that gold cardstock is hard to capture...but here's another angle anyways:

40
This card is also for our current challenge on A Passion for Papertrey. We wanna see you add texture to your creations. For me, I cheated opted for texture with card, but texture can mean anything you want it to!

Thank you so much for visiting today! :)

Signature2


Products Used 
N.B The gold cardstock is from my ancient stash. If anyone knows where you can purchase it from, feel free to drop me a note!


Thursday 11 April 2013

Just a note (and a hop!)...

 This is my second post of the day - please scroll down for my usual CASE Study post or click here. Thanks! :) 

Just a note

Hey!

Hip hip, hooray! The day is here! The new goodies from Uniko Studio are available to purchase NOW! With worldwide free shipping for orders over £50 might I add! *wink*

We're celebrating the release day with a blog hop featuring more of the goodies from the April release. You should have hopped here from the Uniko Studio blog. If you haven't, be sure to start there and leave a comment; prizes are up for grabs! :)

For my blog hop project, I whipped up this super simple card using the new chrysanthemum digital paper pack and a sentiment from the set All Occasion Sentiments.

I'll keep it short and sweet today as there's some hopping to be done! Your next stop is Amber, but should you get lost here's the full list of participants:

Bev @ Uniko Studio   
Aimes - That's me! :)
Amber
Erika 

Gayatri
Nicki 
Ren-Yi 

Stacey
Taheerah (Guest DT)
  

Happy hopping! :)

Signature2

Wednesday 10 April 2013

A final sneak peek...

Happy Birthday

Hey!

So we're at the final day of the sneaky peeks for the Uniko Studio April release! All of the products that we've featured from Day 1, Day 2, Day 3 and Day 4 will be available to purchase tomorrow!

Today we're giving you a sneak peek of another gorgeous stamp set and digital paper collection. Both products feature one of my favourite flowers and a variety that's close to my heart: Chrysanthemums. My dad loved Chrysanthemums :)

The digital paper pack is fabulous, (keep your eyes peeled for a project using it tomorrow *wink*) but I really wanted to focus on the stamp set, 'Pure Florals: Chrysanthemum' for today's card.  I had such pleasure in inking this set up, and the amazing detail of those stamps begged me to try out a bit of watercolouring thanks to some inspiration a la Debby Hughes :)

tips and tricks
  • When using a watercolour technique, it really helps to emboss the outline image of the stamp you're using. The raised edge prevents any ink from bleeding outside the lines.
  • You don't need watercolour paints to watercolour! Use your acrylic stamping block as your watercolour pallette and your inks as your paint. Tap the ink pad directly on to acrcylic block and mix with a damp paintbrush. The more water you add, the paler the colour. 
  • There isn't a stem stamp in the set (though there are some beautiful leaves!) so I simply used an Promarker to draw in my stem :)  
I know I've said it every day so far, but please check out the rest of the Uniko Studio DT if you haven't arleady. I've already had a sneak peek of their projects: you won't be disappointed!

Bev @ Uniko Studio   
Aimes - That's me! :)
Amber
Erika 

Gayatri
Nicki 
Ren-Yi 

Stacey
Taheerah (Guest DT)
  

And of course, be sure to let Uniko Studio what you think of the sneaky peeks so far via the blog and/or Facebook page. There's prizes to be won!

Signature2

Tuesday 9 April 2013

Nautical Circles...

HEY
Hey!

We're back and ready for Day 4 of the Uniko Studio sneaky peeks of the April release. Remember: new products will be available to purchase from April 11th! :)

Today some of the Uniko Studio DT are giving a sneaky peek of two new products: a fab stamp set called, 'Round in Circles' and a coordinating digital paper pack also called, 'Round in Circles'. Both features lots of cool, graphic circles/borders and that will compliment all styles of cardmaking!

For my project today, I've played with the stamp set. You'll be spoilt for choice over which stamp to ink up first, but I decided to jump on the nautical bandwagon and play with the striped circle along with navy ink. I then die cut a letter out of each circle, and then used some scraps from my Day 2 project (From the new On the Grid Digital Paper Collection) for the apertures. I then recycled even more scraps using the coral scraps for a heart embellishment, (created using a paper punch and covering it in Glossy Accents) and added a strip down the side of the card to balance the design.

tips and tricks
  • When stamping a row of circles (or any other shape!) start with the central part first to ensure your design stays central and fits!
  • Die cut each letter individually as the dies can slip you run them through your die cutting machine. It's much easier to keep an eye on one than three dies! If you find they wiggle too much, simply secure on the project using a Post-It note.
Now be sure to see what amazing creations some of the Uniko Studio DT have whipped up with this fun new set and digital paper collection.

Bev @ Uniko Studio   
Aimes - That's me! :)
Amber
Erika 
Nicki 
Ren-Yi 

Stacey
Taheerah (Guest DT)
 

And remember, that there are mystery prizes up for grabs from comments on the Uniko Studio blog and maybe even the Uniko Studio Facebook page too....!

Hope you can join me tomorrow as we introduce yet another fabulous new set to be released very, very soon! :) 

Signature2

Monday 8 April 2013

Flower Power!

for you tag
Hey!

Happy Monday! Ready to kick off this working (or not-so working for me - cue one more week off work!) week with some more Uniko Studio sneaky peeks? Products featured in the sneaky peeks are available for purchase on April 11th!

Today we're giving you a taste of a fabulous new stamp set called Flower Power. Flower Power is a sweet set featuring a graphic flower with a choice of super-sweet sentiments. Don't you just love the font? I do! :)

tips and tricks
  • Get the most out of your sentiment stamps by partially inking them to create a custom sentiment. I partially inked the sentiment stamp, 'I'm here for you' to create the stamp 'for you'.
  • Create your own grass by using the stem of a flower stamp. To add depth, try generation stamping (stamping repeatedly without re-inking)
I made a tag, but be sure to see what some of the Uniko Studio DT inked up for your viewing pleasure:

Bev @ Uniko Studio   
Aimes - That's me! :)
Amber
Erika 
Nicki 
Ren-Yi 

Stacey
Taheerah (Guest DT)


And remember, that there are mystery prizes up for grabs from comments on the Uniko Studio blog and maybe even the Uniko Studio Facebook page too....! What are you waiting for?!

Signature2

Sunday 7 April 2013

Faking it: enamel dot styleee...

Hello
Hey!

Ready for Day 2 of the release sneaky peeks from Uniko Studio? I hope so!

Today we're giving you a sneaky peek of a new stamp set AND a fab new digital paper collection. My card today features both. Remember: all new products featured are available for purchase on April 11th!

The new set, All Occasion Sentiments features mega-sized sentiments that are perfect for providing the focal point for your projects. I love the variety of fonts in the set, and opted to play with this 'Hello' stamp for my sneaky peek project. I know, I know, gold again! I will get bored of it one day....maybe *wink*

Hello Close Up

The digital paper I've used is from the new, On the Grid digital paper collection. I love it! I'm a sucker for grids and I love the variety available in the collection. Y'know when you used to be picky about what graph paper to use at school? Should you opt for the 1cm squared type or the super duper 1mm squared type? Just me on this one? Well this collection is the same for me! Decisions, decisions....! :)

I'm also going to enter this card into the Simon Says Stamp and Show: Anything Goes Challenge. Hurry if you want to enter, the challenge closes later today! 
tips and tricks
  • When working with digital papers - try not to resize them as the design will shrink. Use a crop option instead.
  • See those fancy enamel dots that are popping up on projects everywhere? Yeah, I'd love to get me some of them too! But for now, my old collection of brads are working as my faux enamel dots.  Want then to shine? Then simply add a coast of Glossy Accents to them. A great way to use up the old supplies!
Now some of the Uniko Studio DT are giving more sneaky peeks of this stamp set and collection of papers so be sure to check them out:

Bev @ Uniko Studio   
Aimes - That's me! :)
Amber
Erika 
Nicki 
Ren-Yi 

Stacey
Taheerah (Guest DT)


And I hope you can stop by tomorrow for more Uniko Studio sneaky peeks! :D

Signature2


Products Used
(Not all featured here. I will add new products I've used as they become available to purchase!)


Copyright/Disclosure

I am on various design teams and receive free product to use and promote. I geniunely love the products of the companies and all opinons are honest and my own.

I'm flattered if I've inspired you and you want to CASE anything of mine, but please don't enter it for commercial publications or competitions.
Thank You!
All designs, text, and photographs on Crafting Confessions are ©2009-2016 to Amy Gray unless stated otherwise.