Friday 23 October 2015

Altenew & Pretty Pink Posh collaboration blog hop!

Happy birthday
Hey!

Happy Friday and welcome to a fabulous blog hop full of sequins, super stamps, delightful dies, inspiration, prizes and more as Altenew joins forces with Pretty Pink Posh!


You should have hopped across here from Yuki Yoshioka but if you haven't, then be sure to start out at Altenew HQ. :)

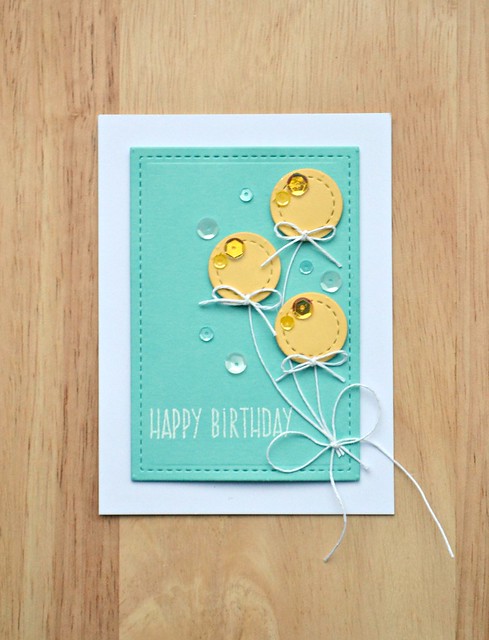
Altenew and Pretty Pink Posh products make the perfect pair for gorgeous goodies to create fun cards. I couldn't resist using the Stitched Duo 2 die set to transform those circles into balloons along with adding a scattering of sequins and a sentiment from my go-to Altenew birthday stamp set, Birthday Greetings. :)

Now what's a blog hop without some prizes? We have two $30 gift certificates for Altenew and two for Pretty Pink Posh to give away. There are two ways to win as Altenew will pick two winners for the Pretty Pink Posh gift certificates and Pretty Pink Posh will pick two winners for the Altenew gift certificates. The best thing is that all you have to do is leave a comment along the hop by Monday 26th October 11:59pm EDT to enter. Simple! Winners will be announced on the Altenew blog and Pretty Pink Posh blog. :)

Well I best let you continue hopping! You're very near the end as the next, and final, stop of the blog is Pretty Pink Posh HQ!

Thanks so much for hopping along with me today and I hope you have a wonderful weekend!

Signature2

Monday 5 October 2015

Colour on kraft...

Season's greetings
Hey!

Well today's the day. If you're looking for something to cure the Monday blues then look no further because the brand-new October release from Clearly Besotted is available to purchase from 10pm tonight! :D

Stephanie will be sharing the sets in full for you to oooooh and ahhhhh over and I guarantee that you'll be totally spoilt for choice! Today's card features the From Our Home mini set; don't you just love that heart-shaped wreath? For me I just knew that this beautiful image had to be heat-embossed and coloured onto kraft cardstock. :)

Season's greetings close up

I love the simplicity of this design and think I could have just struck upon my Christmas card design for the year. It's simple to create this design without the pearl or 3D foam tape for budget-friendly posting too. It's something we have to consider here in the UK for sure!

tips and tricks

  • When heat-embossing such detailed images, I recommend using a detail embossing powder and resisting the urge to touch the cardstock too much beforehand. An anti-static pad always reduces the risk of stray powder sticking to your project too. 
  • Colouring directly onto kraft cardstock achieves a lovely, subtle effect to whatever shade you're using. I attached an ultra-fine nib to my ProMarkers so I could colour the detailed image with accuracy. 
  • I inked the edges of the kraft panel with Antique Linen Distress Ink as this draws the eyes from the darker edges to the central focal point of the image. I wish I'd taken a picture of the before and after of this little trick because it really packs a punch! 

Well if you haven't already taken a peek at the full reveal then you're in for a real treat. Pop across to Stephanie's and feast your eyes on one seriously fabulous release! Shopping list at the ready, peeps! :D

Thanks so much for visiting my little corner of Blogland today. I hope you have a happy Monday and a happy week!

Signature2

Sunday 4 October 2015

A winter warmer...

Sending warm wishes
Hey!

Welcome back to the Clearly Besotted teasers of the super duper October release! Yesterday I steered away from Christmas but today I'm embracing it; after all, it's hard not to with so many fantastically festive stamp and die sets about to hit the store! The goodies will be available for you to purchase from 10pm tomorrow so there's not too long to wait now! ;)

Today I've combined two sets to create a card that I hope evokes those winter moments of cozying up with a good mug of hot chocolate (or mulled wine, perhaps?) with the mittens on for a winter warmer. I couldn't resist wrapping these diddy mittens from the Stitched Mittens stamp set around the mug used with the co-ordinating die from Warm Solutions II. The sentiment is from Stitched Mittens and is so fitting. I also love that this tea-loving and non-coffee drinking gal has managed to stretch a coffee-themed stamp and die set to cater for Christmas. Score!
tips and tricks

  • I stamped the steam on the background and on the top of the die-cut mug to give the illusion of the steam coming from inside. 
  • If you fancy adding a little more warmth and texture to complement the sentiment, then why not use the Stitched Mitten dies to die-cut them from felt for a guaranteed warm, fuzzy feeling. :) 

Well that's all from me today and if you haven't hopped across here from Stephanie's then what are you waiting for? There's sneak peeks galore and even more inspiration from the talented Design Team. Be sure to check it out! :)

As for me, I'm going to be spending today catching up on some more stamping fun and I'll be back tomorrow with a final sneak peek before the release is available to purchase. Can't wait!

Thanks so much for stopping by today!

Signature2

Saturday 3 October 2015

Clearly Besotted sneak peek!

Just a note
Hey!

Happy weekend! Happy Saturday! Happy October (please tell me where the previous month have zoomed by to!) and happy teaser time of the new Clearly Besotted release!

Yup, it's time for some sneaky peeks of the truly amazing October release from Clearly Besotted containing no less than thirteen different stamps sets with eleven of them complemented by co-ordinating dies!


Although there's Christmas galore catered for with this month's release, there's also some gorgeous sets that you'll be itching to ink up all year round. It's been Christmas at work in the office since about May and now we're wrapping up the season I can't even think about making more Christmas cards (although I really need to as the season approaches for real!) so I immediately gravitated to the beautiful Heartfelt Thanks and Fancy Sayings stamp sets with a little help from the co-ordinating Heartfelt Thanks die set to create an easy peasy vase. :)

tips and tricks
  • I used Washi tape to mask off the stem and then the flower heads to stamp them in separate colours. The magic of clear stamps makes this very easy to do! 
  • I added a little more detail to the stamped images by going over them with Copic markers. It's amazing the difference it makes to the most simple of images. 
  • To add a little texture to the background I tapped the same inkpad I used for the flower heads (Simon Says Stamp's Wisteria) onto an acrylic block, added water and then flicked it over the panel with a paintbrush. So easy!  
  • Time to 'fess up! I covered my die-cut vase in Glossy Accents and then it dropped on my work surface, wet glossy-side down! Argh! It only caught the side of it, so once it dried I traced over the affected area with a white gel pen to create a highlight instead. No-one needs know about this apart from you and me, OK? ;) 
Well that's all from me today, but I"ll be back tomorrow with another sneaky peek! In the meantime, if you haven't already, then please do pop across for more sneaky peeks at CB HQ (aka Stephanie's) with links to amazing creations from the Design Team including our guestie, my talented friend, Keren Baker!

Thanks so much for stopping by today!

Signature2<.div>


Copyright/Disclosure

I am on various design teams and receive free product to use and promote. I geniunely love the products of the companies and all opinons are honest and my own.

I'm flattered if I've inspired you and you want to CASE anything of mine, but please don't enter it for commercial publications or competitions.
Thank You!
All designs, text, and photographs on Crafting Confessions are ©2009-2016 to Amy Gray unless stated otherwise.