Thursday 25 February 2016

Altenew & WOW! Embossing Powder blog hop!

Altenew WOW! blog hop
Hey!

Happy Friday Eve! I'm delighted to be a part of a fabulous blog hop today as Altenew have joined forces with WOW! Embossing Powder.


You should have arrived here from Martha Lucia Gomez but don't worry if you haven't, you can start out at Altenew HQ. It's certainly worth hopping along as there's prizes to be won from both Altenew and WOW! :)

For my card, I decided to experiment with a technique I was fascinated by when I was starting out on my stamping adventure: triple heat-embossing. It's an old technique but it was certainly fun to revisit. I applied Altenew Lavender Fields ink onto a piece of Stampbord I dug out from my ancient stash then embossed layer upon layer of WOW! clear embossing powder on top. After my final layer, I pressed the flower stamp from Altenew's Striped Florals stamp set, inked up with VersaMark, into the molten embossing powder and allowed the piece to cool down before carefully removing the stamp to reveal the impressed pattern. A  dusting of gold Perfect Pearls highlights the impressed pattern for that extra finishing touch.

Altenew WOW! blog hop close up

That's all from me for this blog hop. I don't want to keep you too long as there's plenty of hopping to be done! Before you hop on though, it's worth commenting as there's two $30 gift certificates from WOW! and two $30 Altenew gift certificates up for grabs. Winners will be picked from comments along the blog hop and all comments must be left by 28th February to be eligible to win. Winners will be announced on the Altenew blog and WOW! blog on Monday 29th February.

Right. Time for you to get hopping! Next on the blog hop is Sarah Jackaman Read. Happy hopping and have a fabulous weekend!

Signature2

Friday 19 February 2016

Felt, fuzzy hugs

Hugs
Hey!

Happy Friday! I'm back today as promised with another card featuring the Springtime Shapes die set and Pattern Swatches stamp set from the exclusive Simon Says Stamp (SSS) Reason to Smile release. :)

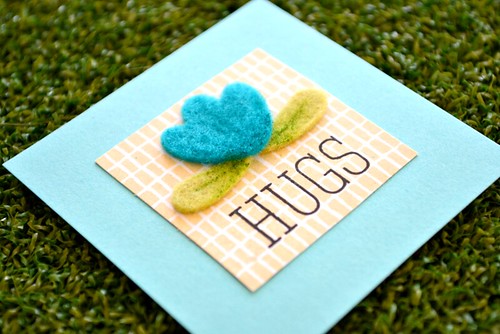
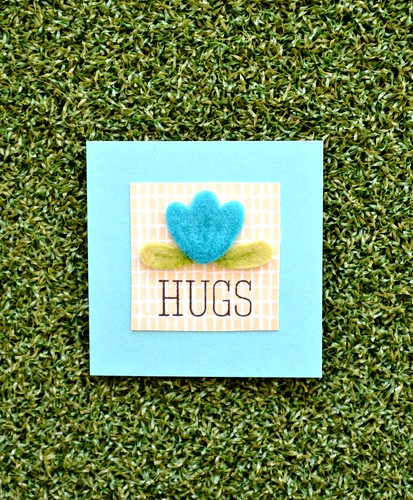
Yesterday I turned an egg and carrot die into a sun, and today I'm turning a carrot top into a flower. complete with petals. I decided to try the dies with felt and it die-cut like a hot knife through butter. Perfect! I love the fuzzy, warming texture that felt can bring to a project. By coincidence, I've spotted that SSS have included sheets of felt as part of their new release so maybe we were thinking along the same lines with die-cutting felt - ha!

Hugs close up
The sentiment comes from SSS's Best Hugs stamp set which is quickly becoming my go-to set for fabulous mix-and-match sentiments.

tips and tricks
  • The flower was created by die-cutting carrot tops from blue and green felt. I then kept the blue die-cut shape as it was and cut up the green die-cut shape to create two petals. 
  • To add a bit more dimension to my felt die-cut shapes, I lightly added detail onto them using Copic markers. It makes so much difference! 
  • Yesterday I used the Pattern Swatches stamp set to add detail onto die-cut shapes, but each stamp works beautifully as a background for a focal point; you've got your pick of six different patterns to choose from with this set!
I believe that there's an amazing blog hop on today to celebrate the Reason to Smile release so I recommend hopping along with it for a serious mojo boost. :D

Thanks for stopping by today and have a wonderful weekend!

Thursday 18 February 2016

Egg + Carrot = Sunshine

With the new day...
Hey!

Happy Friday Eve! I'm sure that's a reason enough to smile, but today I'm sharing another one: The fabulous Simon Says Stamp (SSS) have their exclusive and brand-new Reason to Smile release available for purchase NOW! Check it all out here!

The kind peeps of SSS treated me and sent me a couple of goodies from the release to play with. I've had so much fun with the Springtime Shapes dies and the Pattern Swatches stamp set. These products are available to purchase both separately or as a combo here. I decided to use both of these goodies together in a little unconventional way to show you just how you can stretch these yummy products.

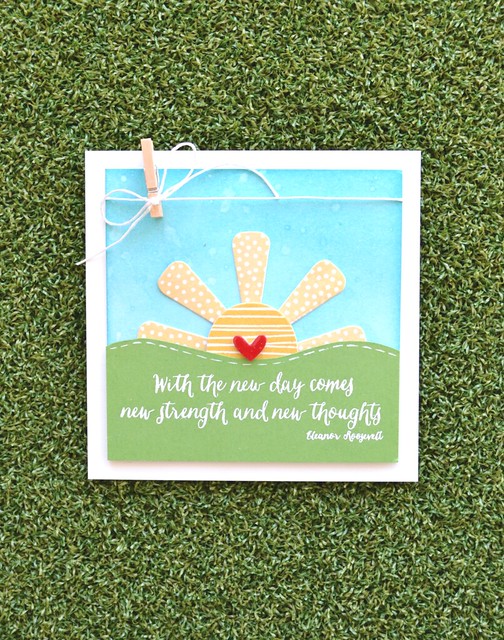
Today's card shows you how an egg and carrot die can be transformed into a sunshine. Not only that, but a fun patterned sunshine thanks to the Pattern Swatches stamp set with Sunshine and Duckling SSS ink.

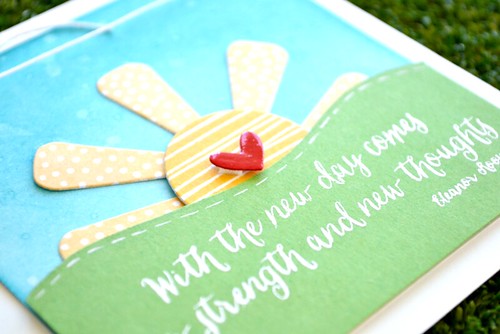
With the new day... (close up)

The sentiment is from SSS's Floral Bookmarking stamp set and I thought it was so fitting for the imagery. The heart is actually a small one from the SSS Stacked Hearts die. I've managed to squeeze a lot of SSS stash on this card LOL!
tips and tricks
  • The sky was created by blending blue Distress Inks onto white cardstock, flicking water onto it to 'bleach' it and then dabbing it with kitchen roll. I actually blending light blue Distress Ink on top of this to make the effect more subtle. 
  • I decided to use two shades of yellow SSS ink and used the darker shade for the centre of the sun. This helps to draw the eye towards the centre, to the heart and then to follow the sentiment. 
  • The sentiment stamp is right-aligned, but I didn't let that stop me using it for this central design. I simply stamped and heat-embossed each line of it separately. Easy! 
  • You can stamp the pattern onto three carrots or sun rays in one go as the pattern swatch stamp is a larger square. It means you use less ink too - bonus!
I have another card using these two goodies to share with you tomorrow. I hope you can join me and in the meantime, why not take a peek at the full SSS Reason to Smile release here? It's amazing and I've got my eye on a few more items from the release that I think I need... ;)

Signature2

Thursday 11 February 2016

Uniko Studio birthday blog hop!

Just for you
Hey!

Happy Friday Eve! I'm back again today, joining in with Uniko Studio's 4th birthday celebrations (if you missed me joining in the fun yesterday, click here). 

Today there's a fun blog hop happening to celebrate not only Uniko Studio's 4th birthday but the February's release of fab stamp sets too. If you've popped across here from the blog then be sure to start out at the Uniko Studio blog. :)

Today's card features stamped images from the fab Limited Edition 2016 Birthday Freebie stamp set. Get your orders in quick and you may just find yourself with this lovely set in your inky mitts too! I stamped a solid image four times to create a frame, cut out the centre carefully with a craft knife and affixed a piece of patterned paper in the aperture with a heat-embossed sentiment. So simple!

I'm keeping it short and sweet today as there's vital hopping to be done and prizes to be won! I've had a blast partying along with Uniko Studio for their 4th birthday celebrations – thanks so much for inviting me on board!

Next on the blog hop list is another fellow Uniko Studio Design Team alumni member: the fabulous Taheerah! Happy hopping!

Signature2

Wednesday 10 February 2016

Happy birthday, Uniko Studio!

Some bunny loves you
Hey!

Happy Wednesday! I'm popping in today as I've been kindly invited on board to join in Uniko Studio's 4th birthday celebrations and the February release. It's hard to believe that Uniko Studio is 4 already! I was on the original Design Team back way back in 2012 when Uniko Studio was starting out so I just couldn't say no to joining in the fun as part of the Design Team alumni. :)

Today it's introduction time and I'm joining in with introducing the adorable 'Some Bunny' stamp set. This mini set contains one cute bunny complete with accessories and mix and match sentiments. I couldn't resist taking some time to enjoy the good ol' fashioned paper-piecing technique with the bunny stamp.
tips and tricks
  • The mini stamps in the set can be used to customise the bunny or to create your own patterned panels as I've done on my card using the flower stamp. 
  • I had some space between the bunny and sentiment which I filled with the small heart stamp.  I like to fill this dead space as it's trapped and doesn't allow your eye to lead anywhere on the design. 
  • If you want to add a more detailed look to your paper-piecing, try stamping the image a few times and cutting out different sections from different images to avoid a uniform pattern on one large piece. 
Well that's all from me today but I'll be back tomorrow with another card to celebrate Uniko Studio's birthday. Until then, be sure to pop across the the Uniko Studio blog to check out more sneak peeks, links to more projects and the chance to win some prizes! :D

Signature2

Friday 5 February 2016

Hey, cutie!

hey cutie
***I ran out of daylight to shoot this card! Fab photography kindly provided by Natalie Garforth***
Hey!

Happy Friday! It's just about the weekend and I'm kicking it off here on the blogeroo with a final project featuring new goodies from the Clearly Besotted February release. These fabulous new products are available to purchase from 10pm GMT tonight! :D

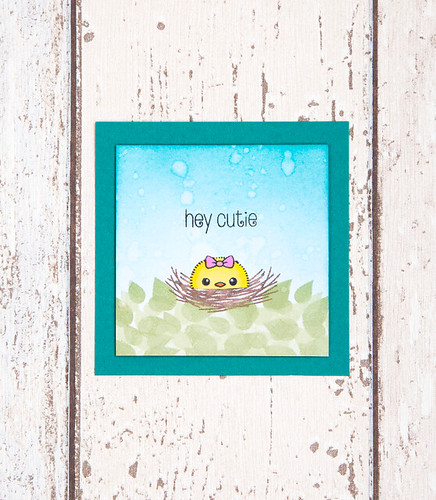
Today's card features no flowers (I bet you were expecting them if you've been here for Day 1, Day 2 and Day 3 of the sneak peeks, right?) but a real combination of the new stamp sets to create a fun little scene. I used the nest from the Nesting mini stamp set, the adorable sentiment and chick from Chirpy Chicks, and leaves from Round Roses. That's a lot of stamp sets for just one card LOL!

tips and tricks
  • The chick is an adorable image of one peeking from a basket of Easter eggs. I simply cut out the chick from the stamped image and popped it into the nest. Easy peasy! 
  • The leaves have been repeatedly stamped along the bottom to ground the nest and I sponged green ink over the top to avoid any large white areas showing through them.  
  • I love that I managed to use three different stamp sets on just one mini card. It's worth looking through your supplies to see what you can mix and match. Clearly Besotted stamps are cleverly designed in a way that they can be mixed and matched with ease. :) 
If you haven't popped across here from Stephanie's, then what are you still doing here?! Stephanie is sharing the full release which should give you plenty of time to pick your favourites before it all becomes available to purchase from 10pm tonight. The rest of the amazing Design Team are sharing their final projects today too and you'll find full links to them on Stephanie's post. :)

Thanks so much for visiting today and over the past few days. I hope you've enjoyed these sneak peeks and that you have a fabby weekend!

Signature2

Thursday 4 February 2016

Trendy tulips...

Mother
Hey!

Happy Friday Eve and welcome back to the Clearly Besotted teasers from the February release! If you're new to the teasing, then be sure to check out Day 1 and Day 2 of the sneak peeks too. All of the new goodies will be available to purchase from 5th February 10pm GMT (tomorrow!)

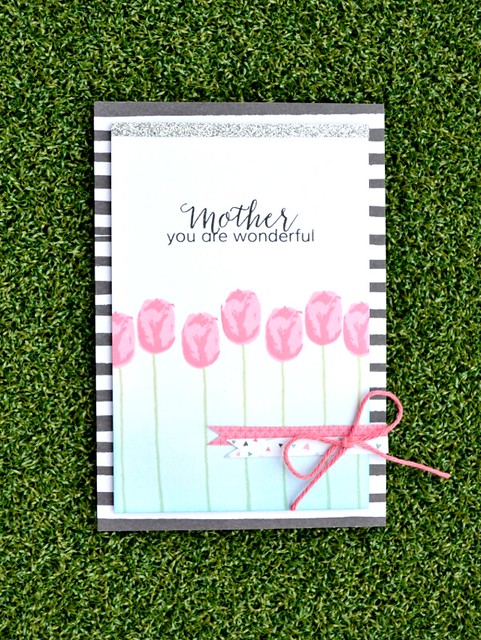
Now I know what you're thinking. More flowers, Aimes? Really? Stick with me though. I've kept my promise from yesterday and today's card features a sneak peek of a different set. Yup, those tulips are from the 'With Love' mini stamp set and they feature multilayer stamps which means you'll be stamping detailed tulips in no time. :)

I decided to stamp a lovely row of tall tulips for today's card and then the rest of the card kinda just happened. I had some of the yummy Crate Paper Hello, Love papers left on my desk from creating this card so I decided to use them again. I like to think the striped paper used on the card front adds a trendy touch to the design. Tulips can be trendy, right?

tips and tricks
  • I lightly blended Broken China Distress Ink along the bottom of my stamped tulips to ground them a little.  It makes so much difference! 
  • Confession: I stamped the sentiment with a little too much space above it for my liking. I didn't want to trim the panel down any further, so I simply added a strip of glitter tape across the top to balance the space a little more.  This is our little secret, OK? 
  • When working with striped paper, I always consider whether horizontal or vertical stripes will work best for the design. Horizontal worked best here as it contrasts against the vertical tulips. 
Want to see more sneak peeks? Then hop across to Stephanie's to check out more peeks of the release along with links to the amazingly talented Design Team sharing even more lovely projects to tease you with.

The full reveal of the release is tomorrow (yay!) and I'll be back with one more final card. I hope you can come chick check it out...hee hee!

Signature2

Wednesday 3 February 2016

Easter blessings

Easter Blessings
*** I ran out of daylight to shoot this card! Photography kindly provided by Natalie Gartforth ***
Hey!

Welcome back to Day 2 of the Clearly Besotted sneak peeks of the February release! If you missed out on Day 1 then click here. All of the new goodies are available to purchase from 5th February at 10pm GMT. :)

I know that I shared a creation featuring the 'You Are Wonderful' stamp set yesterday so I hope you won't mind that today's card features the same set. What can I say? I'm giving you a good peek at it LOL! I love it and I'm going to suggest that today's card is very different in both style and occasion from yesterday's. ;)

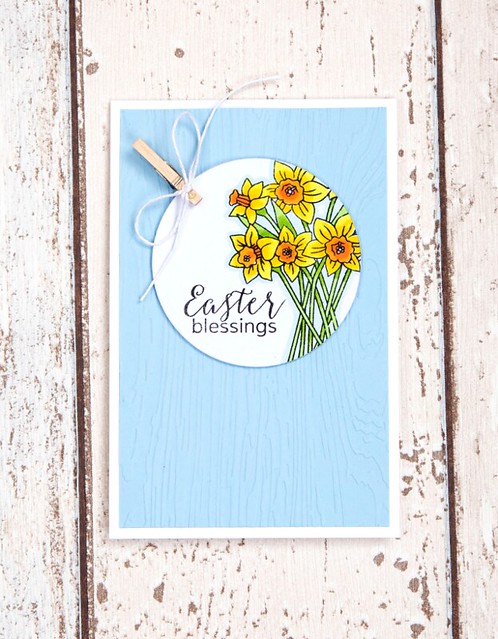
We have an early Easter in 2016 so the new Clearly Besotted release is perfectly timed for me to create a couple of cards ready for the occasion. To give the flowers a bit of a different look, therefore making it kinda different from yesterday's card (have I convinced you yet that it's different?!) I decided to capture a section of the image on the die-cut circle; it goes to show that sections of a stamp can look just as lovely as a full image. The sentiment tucks nicely next to the daffodils too which keeps everything contained snugly in the focal point.

tips and tricks
  • You can achieve a different look with these beautiful blooms by simply changing the colour of the ink used. For yesterday's card I opted to use grey ink which gave a softer, more subtle effect. The black ink used on today's card creates a bolder look. 
  • To make my daffodils really 'pop' I traced around the outline of them using a very light blue alcohol marker. This is a trick that works for any image and will instantly add some depth. 
  • I love to add little twine bows to mini pegs as a finishing embellishment. I find that a good dot of Glossy Accents is great at keeping the twine in place on the wooden peg. :) 
I promise that there are more sets from the Clearly Besotted February release to take a sneak peek at, and the best place to start to check them out is at Stephanie's. I also promise that tomorrow's card will feature a sneak peek of a different stamp set. I hope you can join me then!

Signature2

Tuesday 2 February 2016

Clearly Besotted Sneak Peeks: Day 1

Hugs
Hey!

Normally I'd say something along the lines of not believing that it's a new month already, but I'm actually sat here thinking that January seemed to be running in slow motion LOL! Maybe it's a winter  thing, but nevertheless it's a new month which means we have some sneaky peeks of the new Clearly Besotted release to tease you with. Yay! :)

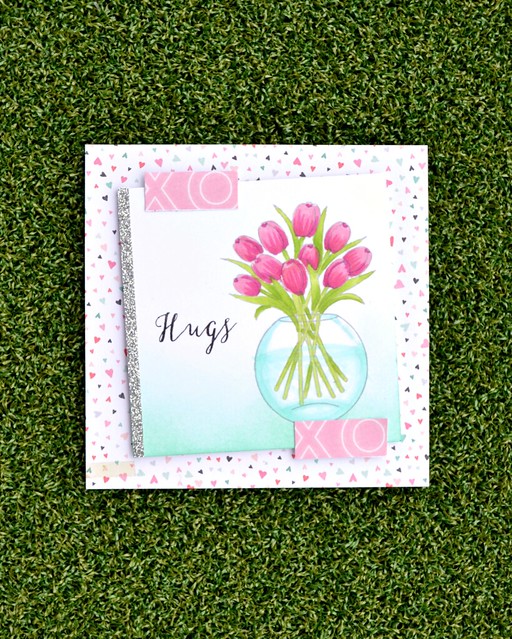
The February release is nothing short of fabulous and adorable in equal measures. I've had such a blast stamping with the new sets and I can guarantee that you're in for real treat. Today's card uses the beautiful 'You Are Wonderful' stamp set which features springtime blooms and beautiful sentiments in a stunning font. I've said it before, but it's worth saying again: No-one designs floral stamp sets quite like CB!
tips and tricks
  • The vase is a separate stamp. I created a mask of it, placed it on the stamped vase and sponged Cracked Pistachio Distress Ink along the bottom to subtly ground it. 
  • I'm going to admit that it did pain my perfectionist ways to mount the focal point at an angle, but the two strips of patterned paper help to balance (and straighten!) it a little. 
  • Those little strips of patterned paper are actually strips of contrasting patterns along the top of each 6x6" sheet of patterned paper. They're worth holding onto and cutting up to create fun finishing touches. I like that the 'XO' pattern echoes the sentiment too – bonus!
You'll see that I'm embracing and actually using (yes, you heard me, using!) some yummy new papers from Crate Paper's Hello, Love collection. I'm promising myself that whenever I indulge in a new paper pad that I must use it instead of sit admiring it. I think this is a good start for me!

Well, that's all from me today, but if you haven't already popped over here from Stephanie's (aka: CB HQ) then hop across there now to see more fabulous sneak peeks from the rest of the Design Team including this month's guestie, my talented friend, Keren Baker! :)

As always thanks so much for visiting today. I hope you can join me for more sneak peeks tomorrow!

Signature2

Copyright/Disclosure

I am on various design teams and receive free product to use and promote. I geniunely love the products of the companies and all opinons are honest and my own.

I'm flattered if I've inspired you and you want to CASE anything of mine, but please don't enter it for commercial publications or competitions.
Thank You!
All designs, text, and photographs on Crafting Confessions are ©2009-2016 to Amy Gray unless stated otherwise.