Showing posts with label 3D project. Show all posts

Wednesday, 10 April 2019

Retro Cool Cricut Mug & Coasters

This is a sponsored conversation written by me on behalf of Cricut. The opinions and text are all mine.


Floppy Disk Mug

Hey!

Happy Wednesday! I'm back with another fun project created with my Cricut Maker - I've explored testing out this sweet machine with fabric as I start my sewing adventure, glitter iron-on materials as it joined forces with the EasyPress 2 so what's left to try out? Yup, good ol' vinyl.

I've always been a fan of a vinyl project, mainly because it's such an easy medium to work with that's super-quick for adding a personal touch to objects. So, without further ado you'll see hat I've used new technology to celebrate old technology with this floppy disk mug.

It was sooooooooooo easy to create; the floppy disk design can be found on Cricut Design Space and all I had to do was resize the image to fit my mug. I'm impressed at the accuracy and intricate detail the Maker cut from white vinyl - I mean, have you seen that tiny decimal point on the reference to the size of the floppy disk?! Amazing! I'd always recommend using the Cricut Transfer Tape to transfer the vinyl design with ease and precision - it makes sure that all of those teeny, tiny elements stay in place *wink*.

This mug was designed for my husband; Mr Gray is a geek at heart and has a soft spot for retro technology. Given that I'd designed this for the front of the mug, I couldn't resist adding a sentiment to the reverse side:

Old School Cool Mug


I was happy with the mug as it was, but decided to go just one step further and create a co-ordinating double-sided coaster. Well....I actually made two so I could shoot both sides of them in one go for you!

Old School Cool Coasters
The coasters utilised the EasyPress 2 and must have taken all of 10 minutes to make, if that!

I can confirm that Mr Gray loves his new mug and co-ordinating coaster and he's fully aware not to pop the mug in the dishwasher. With vinyl it's best to always gently wash any decorated items for longetivity.

Now you don't have to go all 'old school cool' with this technique. The beauty of Cricut Design Space means that there are literally hundereds upon hundreds of designs you could use and so many different colours and varities of vinyl that the looks you can create are endless! So next time you're out and about, grab those inexpensive coasters and mugs and discover just how fun it can be to customise them!

Speaking of coasters and mugs, I think it's time I signed off to fill my own mug with a cuppa. Thanks so much for stopping by today!

Signature2

Wednesday, 27 March 2019

Cricut EasyPress 2 Review

This is a sponsored conversation written by me on behalf of Cricut. The opinions and text are all mine.

Cricut EasyPress Project

Hey!

Happy Wednesday - we're halfway through the working week, though mine is proving to be a busy one this week as I'm heading away for a business trip to Germany tomorrow. Kinda hoping I may find some yummy pretzels on the way...*wink*

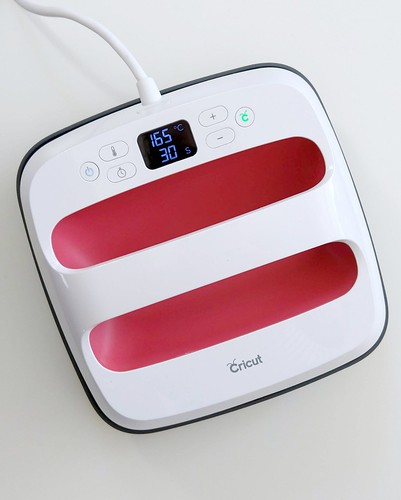
Anyways, enough about my working week, I'm here with a review of a hot product on the crafty market (I mean literally H.O.T.) - the Cricut EasyPress 2 9" x 9" plus the Cricut EasyPress Mat in size 12" x 12".

Cricut EasyPress and Mat

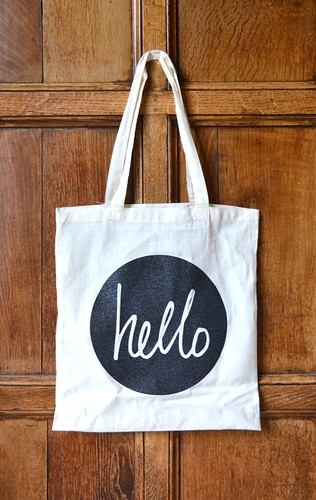
Cricut kindly gave me these product to review and here is my honest account of them. Firstly, let's take a closer look at the Cricut EasyPress 2. Now I'm a convert when it comes to playing with Cricut iron-on materials as you may see from past projects here, here and here. In fact, I still treasure this 'Hello' bag I made at the Cricut event waaaaaaay back in 2014.

hello tote bag

For these previous projects, I'd cut my project on my Cricut Explore and use my iron to apply the iron-on material. Completely logical, right? So what's different with the Cricut EasyPress 2 and why is it better over a regular iron? Well let me list the many reasons why:

1. EVEN APPLICATION OF HEAT
This EasyPress 2 features a super-smooth ceramic-coated heat plate in sizes beyond that of your regular iron in three sizes: 6" x 7", 9" x 9" and 12" x 10". There's a size for every project, but for me and my needs the 9" x 9" is juuuuuust right. No more moving the iron around over an iron-design to make sure it's all received the same application of heat - hurrah!

2. EASY TO USE
Now I'm not saying an iron is hard to use (well...if it gets me out of regular ironing then I'd argue it!) but this machine is so incredibly easy to use. Simply use the interactive or downloadable guide to say what material your Cricut iron-on material is and what you'd like to apply it to and you'll be told the exact temperature required and pressing time. Simply input that in the EasyPress 2 and you're ready to go!

3. PROFESSIONAL RESULTS
Now, this is the biggy for me. An iron will apply iron-on material just fine, but you need an even heat and pressure over the design if you want it to be durable wash after wash. The EasyPress 2 does just that - especially when combined with the EasyPress Mat.

4. SAFETY
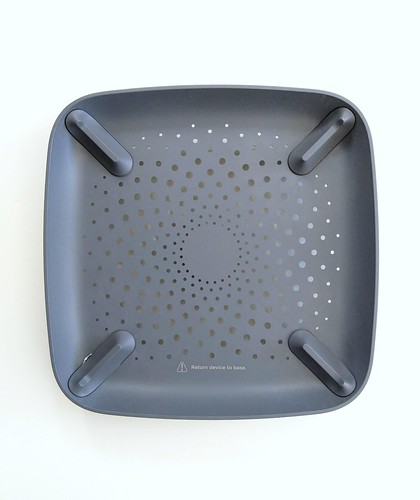
Another biggy here - especially for accident-prone peeps like me! The EasyPress 2 comes with an Insulated Safety Base that protects the heat plate. As an added bonus it's pretty too! I mean, have you ever seen a prettier Insulated Safety Base? I thought not.

Cricut EasyPress Base

This base means you don't have a hot plate exposed to accidental touching like I do with my iron. Even better, the EasyPress 2 will also automatically turn off after 10 minutes of inactivity as an additional saftey feature.

WHAT'S INCLUDED?
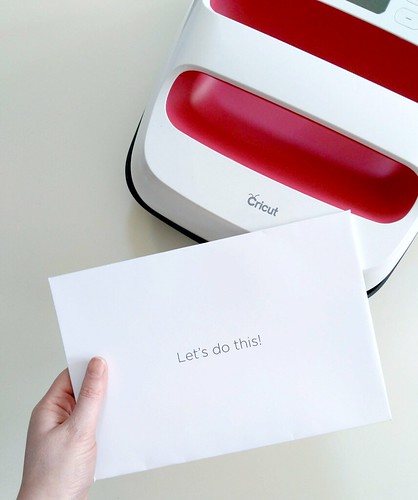
When you open the EasyPress 2, Cricut share in the excitment with their fun branding and design:

Cricut EasyPress - Lets do this

I love how Cricut make you feel so special when you open one of their products - it's that attention to detail that gets me smiling like the Cheshire Cat!

You can get started straight away as Cricut kindly include a cotton drawstring bag and a sparkly green Cricut logo iron-on design! I'm saving the bag for a future project, I just need to decide what to put on it...

Cricut Easypress Contents

So that's the EasyPress 2. Now let's look at its partner in crime: the Cricut EasyPress Mat. Now this is not complusory to have alongside the EasyPress 2, but it definietly aids in achieving that professional finishing result thanks to the technology it incorporates. You can use a regular folded towel under your projects, but the EasyPress Mat features five layers of heat-resistant, moisture-wicking insulation and this is key for achieving that durability with iron-on designs. The mats come in three different sizes, each one complementing each size of the EasyPress 2 family.

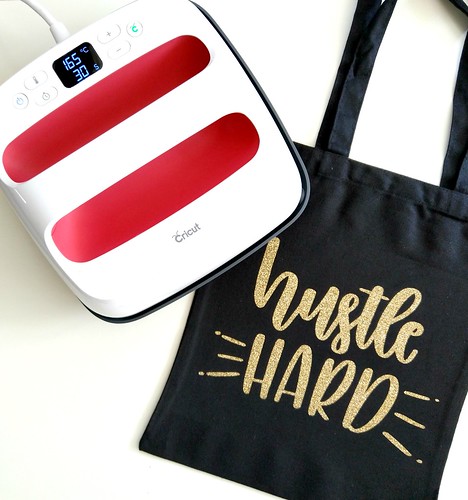
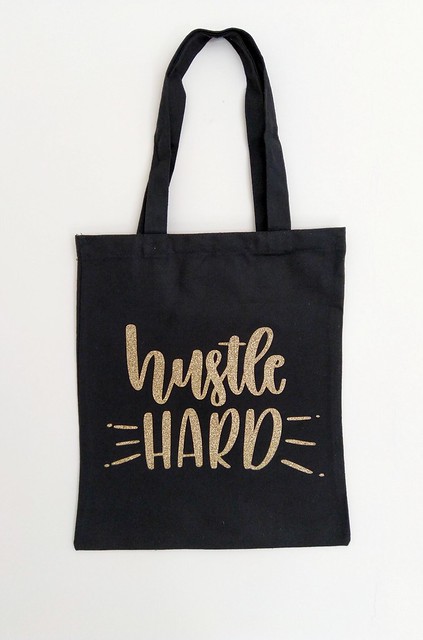
Now, let's have some fun and combine the Cricut EasyPress 2, the EasyPress Mat, the Cricut Maker, some gorgeous gold glitter iron-on material to show just how easy it is to create your own iron-on projects!

STEP 1 - PRE-WASH YOUR ITEM
Whatever you're going to apply your iron-on to, it's recommended that you pre-wash it without fabric softener. This helps to improve the durability of the finished project.

STEP 2 - PICK A DESIGN
There are soooooooooooo many designs you can choose from in the Cricut Design Space library - many specifically designed for iron-on designs. Some of them are free, some you have to pay a small price for. I wanted to customise a black tote bag with artwork I'd purchased from Etsy by liliumpixelsvg, and the joy of Design Space is that you can do this with no problem whatsoever and for free!

STEP 3 - CUT THE DESIGN

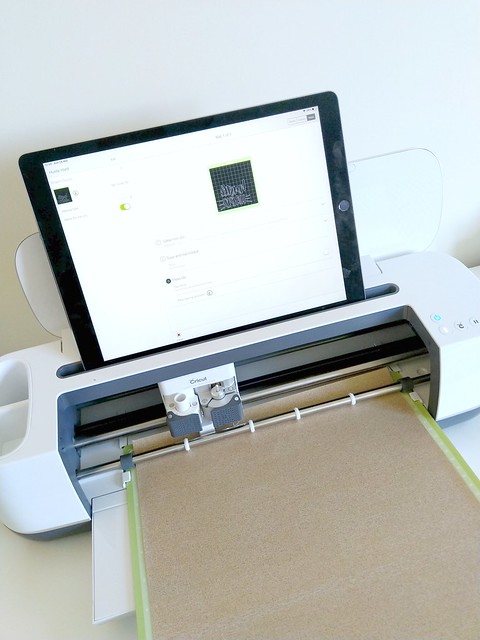
Don't forget to mirror your design when cutting it from iron-on material! Also place the iron-on material shiny side down onto the mat.

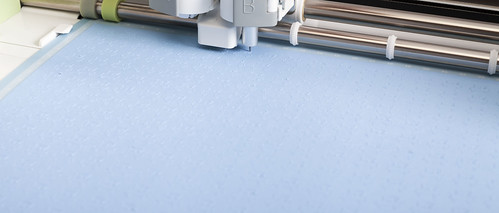
Cricut Maker Cutting Glitter Iron On

You can leave the Maker to it, but I can never resist watching the cutting process  - it's quite hypnotising!

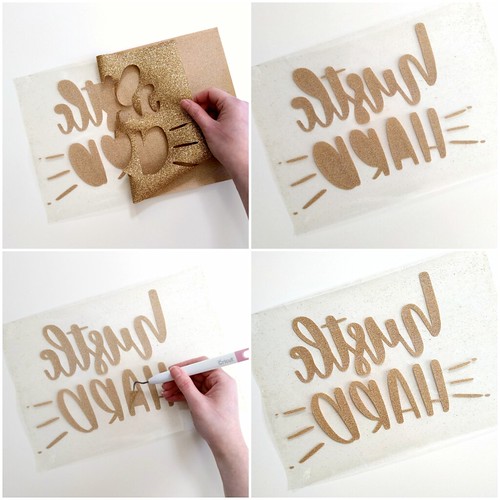
STEP 4 - WEED THE DESIGN
Basically, remove the background from the cut design. This is easy done when combined with the weeding tool. I find it quite theraputic!

Weeding Process

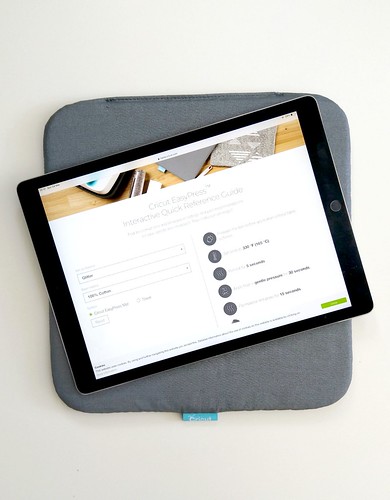
STEP 5 - SET UP THE EASYPRESS 2
Simply access the interactive guide here or download a guide to determine the settings required on the EasyPress 2.

Cricut EasyPress Interactive Guide

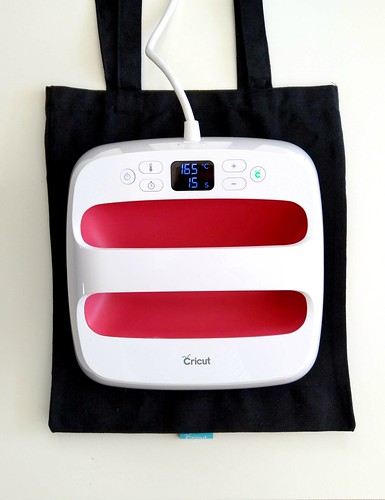
Input the required temperature and timing into the EasyPress 2.

Cricut EasyPress On

A green light will show and it'll  beep to let you know when it's ready (another feature I appreciate!)

STEP 6 - PREP THE BASE MATERIAL
Place the base material (in my case, a tote bag) on the Cricut EasyPress Mat (or alternatively a towel) and apply the EasyPress 2 on top for five seconds to withdraw any moisture. This step is really imporant to achieve that durability - don't skip it!

STEP 7 - PRESS IT, BABY!
Position the iron-on design on the project and press the EasyPress 2 on top for the required amount of time by pressing the Cricut button to activate the timer. You don't need to press down super-hard. Then flip over the project and press the reverse side of the project for 15 seconds.

Cricut EasyPress Action

Again, this is an imporant step for durability purposes so don't skip it!

STEP 8 - PEEL AWAY
Depending on the material used, peel the shiny backing of the iron-on design away while the project is still warm or when it's cooled. The interactive and downloadable guide will inform you whether to adopt a warm or cold peel for you project.

STEP 9 - TA-DAH!
Your project is complete!

Hustle Hard

Allow 24 hours after application before washing and always wash and tumble dry the project inside out.

I think I'm going to find it hard to part with this bag, much like the first 'Hello' bag I made back in 2004, this one is going to stay with me. *wink*

I hope you found this review and project useful! I'll be back with more in the future for sure. Thanks so much for stopping by today!

Signature2

Saturday, 26 January 2019

Upcycled Mandala Stool

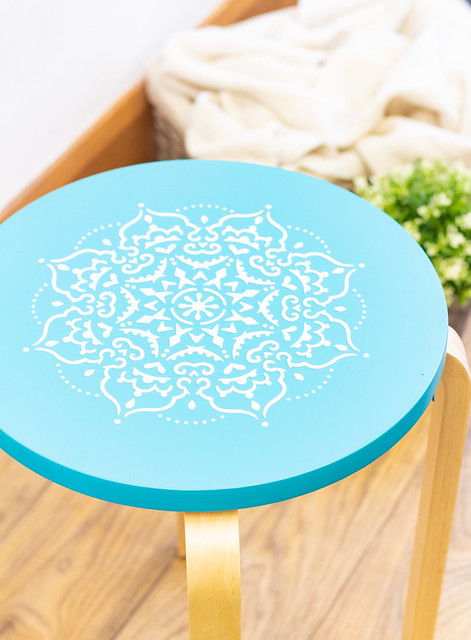
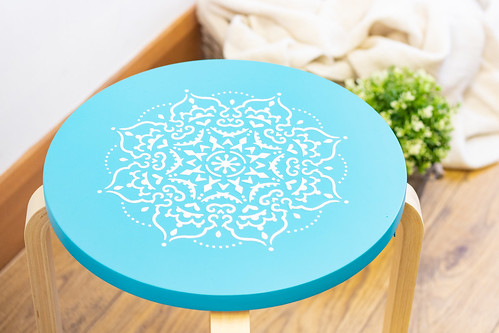
Mandala Stool Close Up
Photography credit: www.crafterscompanion.co.uk
Hey!

Hooray for the weekend! Hooray for saying goodbye to what has felt like a super-crazy-busy week! I’m looking forward to finding some time to wind down this weekend and getting a little more creative. :)

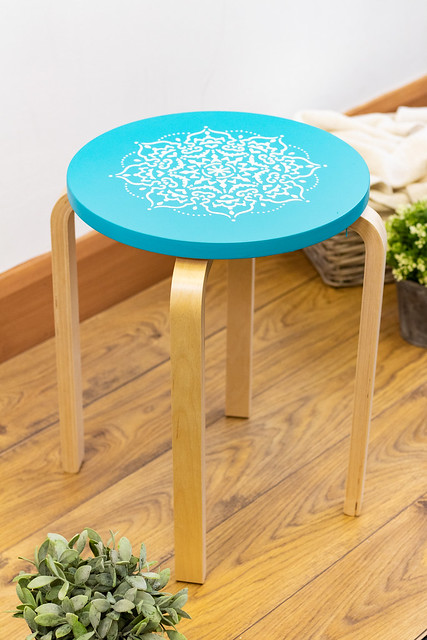
So, do you remember this post where I shared a work-in-progress shot of what I busy creating? Well, the reveal time has come to share the finished project. This upcycled stool was so easy to create with basic supplies.

Mandala Stool
Photography credit: www.crafterscompanion.co.uk
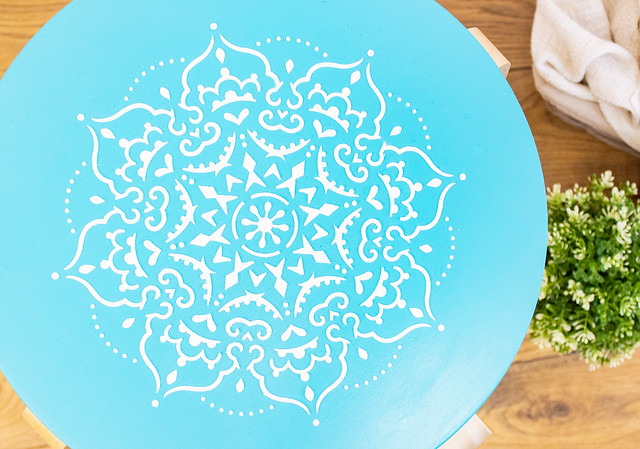
I purchased this stool from IKEA and simply sanded the seat, painted it and then stenciled this stunning mandala design onto it before assembling the stool:

Mandala Stool Bird’s Eye View
Photography credit: www.crafterscompanion.co.uk
Ideally, you’d want to use white spray paint for the stenciling process and then seal it. However, I didn’t have any to hand and I was in the creative zone I used embossing paste instead. This added a really cool dimension, but I wouldn’t recommend doing this if you want to park your tush on it! This will be more of a decorative stool for the home *wink*.

Mandala Stool Close Up 2
Photography credit: www.crafterscompanion.co.uk
The stencil is part of a range of home décor stencils that Threaders have just launched. Threaders are more commonly associated with sewing, but the beauty of these stencils is that they can be utilised across so many different crafts! Not only are there intricate mandala designs, but there are super-cute Scandi styles too. I’ll definitely be playing with more of these in the future!

If you’re interested, the stencils can be found here. They come in sets of two, and if you act quick, they’re currently on offer at two packs for £20!

Thanks so much for stopping by today. I hope that you have a super-duper weekend!

 Signature2

Monday, 22 October 2018

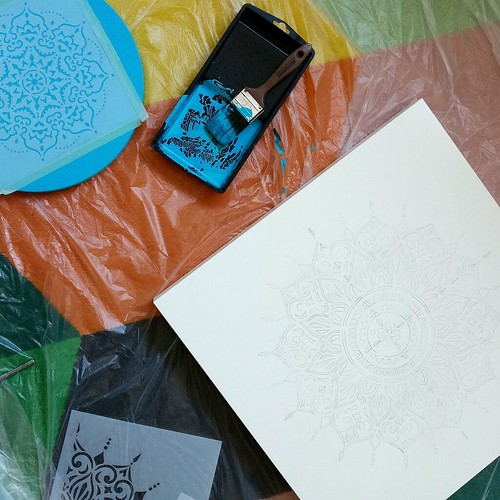
Work in progress...

Work in Progress

Hey!

I'm gonna start today's post with a question. What's your idea of a lovely day? Mine would have to be getting creative, enjoying some winter sunshine and getting some fresh air in the countryside with a walk to gather thoughts. And that's exactly what I've done today on my day off. :)

I couldn't resist sharing a work-in-progress shot of some creative fun I've been having on my lovely day today. It's technically a sneak peek of some products. I can't say any more at this stage but I'll be able to say more in early 2019. ;)

I must admit that it makes a change to step away from cardstock and paper, but I'm really enjoying it. Stencils, paint, and items to upcycle from IKEA - this could get addictive...!

Right, I'm gonna keep things short and sweet as it's time for me to sign off and clean up today's creative mess! Thanks so much for continuing to stop by, I know I'm a tad intermitent with my posts at the moment as I take a slight step back from things but fear not, the creative bug has still got me and it's a bug that can stay as long as it likes!

Signature2

Wednesday, 3 September 2014

Getting into the 'spirit' of Halloween

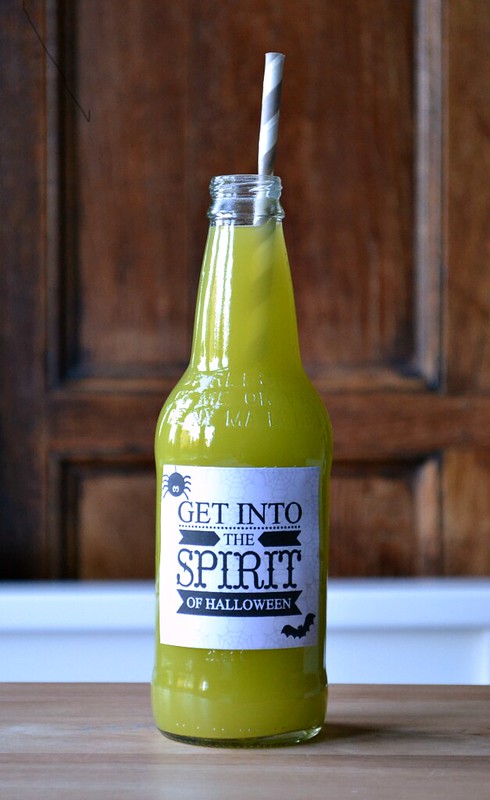
Halloween drink
Hey!

Ready for day two of the Clearly Besotted Stamps sneaky peeks of the new release? I hope so! If you're playing catch-up then check out yesterday's sneak peek here. The new release is available to purchase on Friday 5th September at 10pm (UK time).

Yesterday I got a little festive with Eastern Delights. Today it's time for something a little more spooky with a grown-up twist for Halloween. Halloween Spirit is a simply spook-tacular stamp set featuring fun (and creepy!) images and sentiments. My eyes were immediately drawn to the sentiment used here and although I'm sure Stephanie was thinking of spirits associated with Halloween when designing this, my mind turned to the kind of spirits you can drink *wink*.

So cue a custom-made label to put on my bottles filled with a special brew containing a spirit (or two!). I love the fact that word 'spirit' is the focal point of the sentiment - totally perfect for this idea! It might be hard to see on my picture, but I stamped the tiny cobweb stamp repeatedly to build a spooky background to my label and then simply stamped the sentiment, a spider and a bat. I'm not kid ding when I say that this literally took minutes to create so it could be easily mass-produced for a party.

Well that's enough of the spirits for me at this time of the morning LOL! Why not pop across to Stephanie over at CBS HQ to check out even more sneaky peeks with links to the rest of the Design Team who are sharing teasers too? Who knows, you might even find a few more spirits on your blog hopping adventures today *wink*.

As always, thank you soooooooo much for stopping by today. It feels good to be back blogging again - I've missed you guys! :)

Signature2


Wednesday, 28 May 2014

More 'Exploring'...

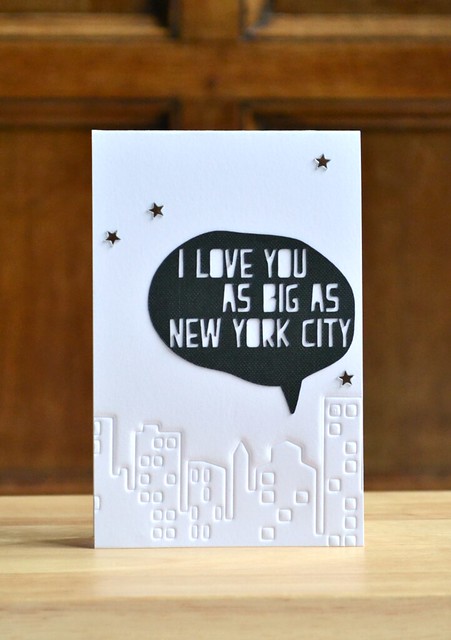
I love you as big as NYC
Hey!

I'm back today, as promised, to share with you a couple of projects created using the Cricut Explore. This machine is available in the USA and hits the UK market on 1st June. For more deets on it, check out my review post here. 

As I mentioned in my review post, this machine has had me 'exploring' on crafty adventures that I'd never imagined myself going on. Heck, this machine achieved the impossible and had me enjoying ironing LOL! But for today's post I've reverted back to my comfort zone a little with this card. I immediately fell for this speech-bubble image in the Cricut Design Space and just knew I had to use it on a card.

The image was so easy to customise: I simply loaded it up, changed the size, and cut it on some textured black card that came with the machine. After that, it was simply a matter of impressing a Memory Box skyline die across the bottom of a card base; attaching the speech-bubble sentiment; and sprinkling a few star. Finished!

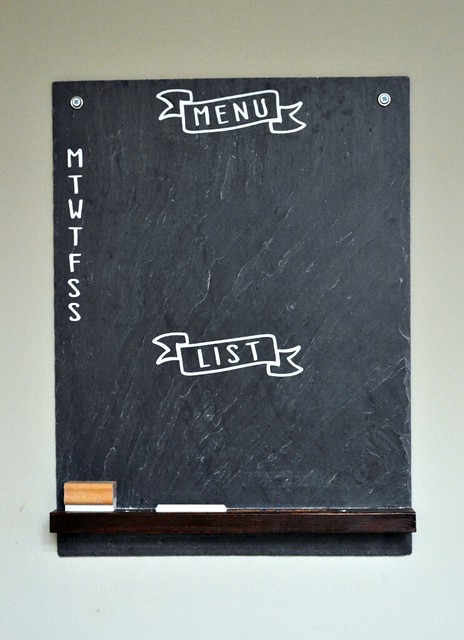
In addition to playing a part in my papercrafting and my laundry room, this machine has also explored our kitchen. Our chalkboard to be precise:

chalkboard

This was created using a banner image and a chalkboard font on the Cricut Design Space and was cut from Cricut Vinyl. The joy of using vinyl is that it's repositionable and I can remove it easily if I need to; I think this vinyl could be staying put though. :)

tips and tricks
  • You can customise the speech-bubble design further by deleting the text and adding your own sentiment. If you love the font originally used (as I do!) then try these free fonts, Helveticamazing or KG Bless Your Heart.
  • To impress my die on to the card rather than cut it, I simply followed an embossing sandwhich on my Cuttlebug along with an embossing mat. Mmmmm embossing sandwich - sounds yummy LOL!
  • The Cricut Vinyl I used to create the chalkboard stickers was originally silver as I didn't have any white. Too impatient was I, that I went ahead and cut the design from the silver vinyl and applied a layer of white acrylic paint over it. Worked a treat and any brush strokes are in keeping with the chalkboard theme anyway - bonus! :D
I have yet more 'exploring' to do with this machine and more projects to share with you. I wonder what room of our place we can invade explore next....?

Thanks so much for visiting today. I hope you have a super duper day!

Signature2


Products Used
N.B I've listed products that are available here as well as across the pond in the USA via Amazon. They appear below as multiples of the same product - just click on the one based on your location. :)

Sunday, 25 May 2014

Exploring...

Hey!

Happy weekend! I'm here today to share a product review that has revolutionised my crafty world and has even had me ironing in the name of craft! If you don't know me already, getting me anywhere near an iron is a pretty big deal LOL.

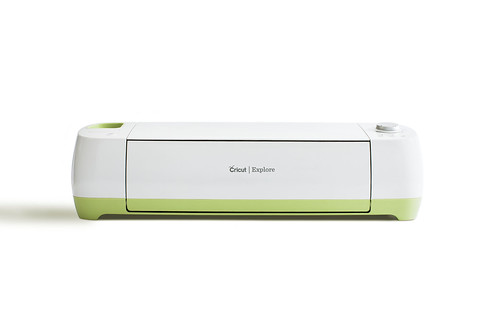
Yup, I'm talking about the newest electrical cutting machine to hit the market: the Cricut Explore.
55770_Explore_Closed_01
This baby is already available in the USA and hits the UK market 1st June 2014 (it's currently only available through the shopping channel, Create and Craft.) I was invited to an event in London in April to take a closer look at and to speak with the people from Cricut and fellow crafty peeps. It was a fabulous event - a perfect day out with my friends Caryn, Michelle, and Stephanie - and I left inspired. Totally inspired.


 Back: Mandi - Vintage Revivals, Me, Caryn - Glitter Me Silly, Kim - The Tom Kat Studio and Kristy (from Cricut)
Front: Michelle - The Card Grotto, Stephanie - Clearly Besotted Stamps

You can even check out my views of the product at the event on a video Cricut EU shared on their Facebook page recently (I'm on from 2.24 mins in if you want to skip to it or skip over it!).

I've been lucky enough to have some one-on-one time with this machine over the last month to get acquainted. It's love. Before I go on further, I'd like to make it clear with you that I was indeed sent this machine for free to play with. Even so, my review remains honest and my own opinion. If I don't like something, don't worry, I'll let you know! :)

This sleek looking machine has been a long time in the making, but boy is worth the wait. I think just about every detail has been thought of. Even the most novice of crafters can be creating with this machine (and a computer) in a matter of minutes.

Here are a ten of my favourite things about it:

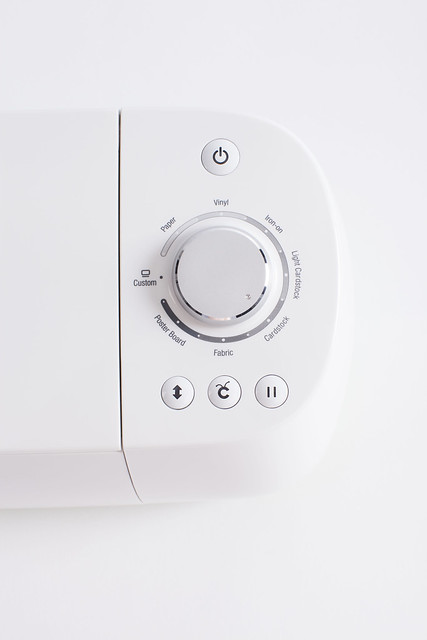
1. The ability to cut a wide range of materials with the simply twist of the switch. No more experimenting with blade pressure and speeds, wasting material and time like the electronic cutting machines of the past; nope, this thing calculates all of this for you.
55770_Explore_Dial_01

2. Detailed precision cutting with Cut Smart technology down to the smallest of images!
55770_Explore_Open_blade_cutting_01

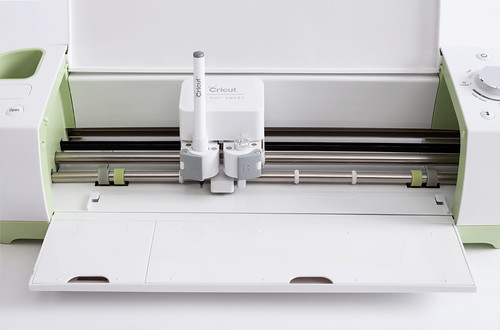
3. The ability to score and cut or draw and cut in one go! Oh hello, boxes galore! :)
55770_Explore_Open_marker_01


 4. Its hidden compartments that store all of your tools that belong with the machine. Everything stays together neatly and compactly. 

5. Now I think this is my most favourite of them all. The ability to create from scratch. I'm serious! It feels like the only limit is your imagination with this machine. It allows you to use and cut/draw all fonts on your computer, png files and svg files for FREE! This awesome for those of us who like to design.

6. The Cricut Design Space with a library of over 50,000 images makes creating projects easy peasy. You can start with a project already designed and cut and go, or customise a project for your own needs. Even if you don't own an image already, the software will let you play with it to make that final choice whether to purchase it or not.

7. And speaking of purchasing, Cricut have finally seen the light with their new CEO and now the pricing strategy over here in the UK is now in line with the US pricing. Single images can be purchased at 79p each ($0.99 in the US) or there's a no-commitment monthly subscription with access to over 50,000 images at £7.49 or an annual subscription at £79.99. 

8. Existing Cricut users can use their existing cartridges with the new Cricut Design Space.

9. It can so many different materials including leather!

10. It has allowed my crafting hobby to venture outside of card making and into other areas of the home without fear! 

11. Did I say 10 favourite things? Ooops! I've got 11! Cricut are soon to release the ability to sync and cut project using wireless technology. Yay!

I honestly thought this machine was going to cost £500+ given the quality of it and what it's capable of. It's a considered purchase of course, but at £249.99 you're certainly getting your penny's worth.

I honestly can't wait to share the projects I've created with this machine. Let me just say that nothing in our place is now safe from being 'explored!' Ha!

Nope. I can't do it. In going to have to share at least one project with you:

hello tote bag

Papa's Aimes' got a brand new bag! A simple project that was created with an existing image in the Cricut Design Space cut from black glitter iron-on material. It's the most fun I've ever had ironing!

I promise to share more projects very soon! But until then, I recommend you take a peek at this machine. It's certainly got me excited! :)

I hope you all have a wonderful day and extended weekend if you're lucky enough to have one (hooray for bank holidays!). As always, thanks for stopping by today!
Signature2


Friday, 18 April 2014

Milk & Eggs...

Easter Milk Carton Close Up
Hey!

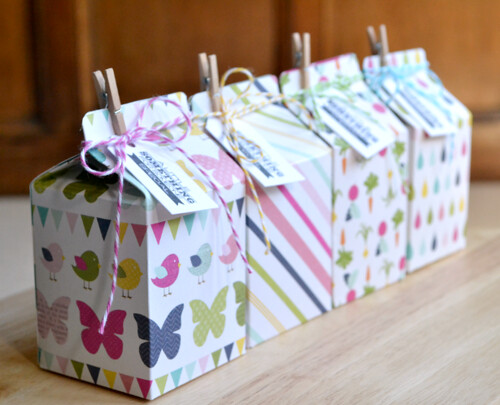
Happy Good Friday!  Today I'm travelling across to see my side of the family to deliver these Easter treats to my nieces and nephews. I like to create something every year for them and although I'm sure that they're waaaaaay more interested in the contents of the items I whip up for them (mini chocolate eggs this year), I still like to create them. :)

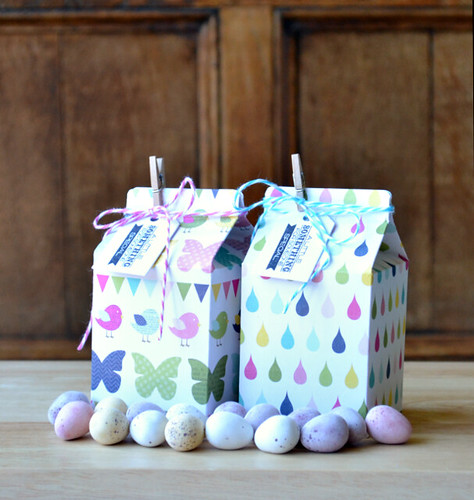
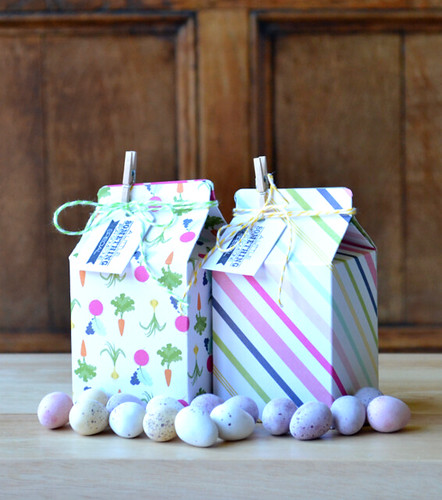
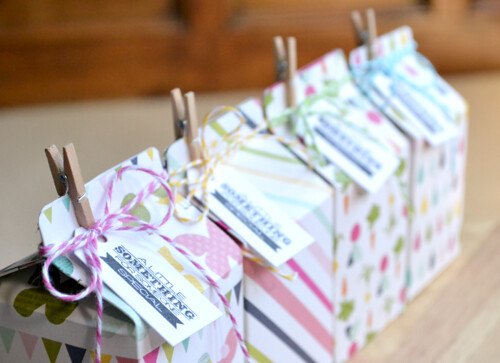
So what is it this year for my lovely nieces and nephews? Milk cartons! Nope, there's no real link to Easter with milk cartons but I love the shape of them so that's what we're going with:

Easter Carton 2a
Apologies about the total over expsoure in these two pictures - it's that darn sunshine. Small price to pay for happy sunny days though, right? ;)

Easter Carton 1a
This year's containers were so easy to create thanks to using my Cricut Mini. I simply cut the the milk carton from various sheets of this lovely paper collection, Splendid Sunshine, from Echo Park Paper Co using the Tags, Bags, Boxes & More 2 digital cartridge. I think this patterned paper is pretty fitting for Easter with it's springtime vibe. :)

Easter Carton 5

You may notice that the photo props (Cadbury's Mini Eggs) deplete as the pictures continue. What can I say? They just disappeared somehow! ;P

Easter Carton 6

To secure these sweet cartons, I added some tape inside the top flaps. Twine didn't hold it secure enough to prevent me or my guy from breaking into them for my liking.

Easter Carton 7

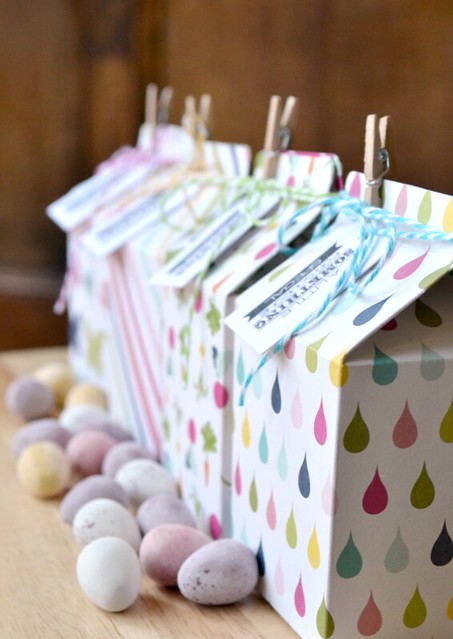
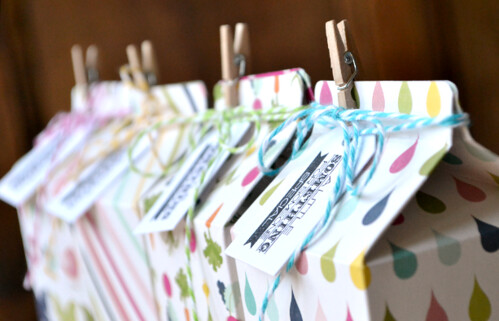
After safely securing the tops with tape, each carton was decorated with Doodlebug twine, and a die-cut tag and stamped sentiment from Clearly Besotted Stamps' Tag Along stamp set and die collection. Oh, and a mini peg too - I just couldn't resist! ;)

Easter Carton 10

Here's hoping that these cartons surviving their transit today! Have a fabulous Friday, whether you celebrate Good Friday or not, and a wonderful weekend (bank holiday here we come! - woop woop!)

Thank you so much for visiting today!

Signature2


Products Used
FYI: There are two links to all Clearly Besotted Stamps goodies. One links direct to the UK store and one links to a USA supplier, Simon Says Stamps.


Copyright/Disclosure

I am on various design teams and receive free product to use and promote. I geniunely love the products of the companies and all opinons are honest and my own.

I'm flattered if I've inspired you and you want to CASE anything of mine, but please don't enter it for commercial publications or competitions.
Thank You!
All designs, text, and photographs on Crafting Confessions are ©2009-2016 to Amy Gray unless stated otherwise.